Build a Crud application using Vue and Django
As a developer, CRUD (Create-Read-Update-Delete) is one of the basic operations to know. In this tutorial, I’ll show you how to build an API with Django REST Framework and a SPA with Vue.js. I am going to show you step by step from scratch.
Before we kick off
Learn Vue.js and modern, cutting-edge front-end technologies from core-team members and industry experts with our premium tutorials and video courses on VueSchool.io.
Take a look at the CRUD app we will build:
CRUD API with Django REST Framework
Django REST framework is a powerful and flexible toolkit for building Web APIs. Open your favorite command-line interface and make sure to install Pipenv. Pipenv is one of the best tools to manage Python project dependencies.
mkdir subscription-api
cd subscription-api
pipenv install --three
pipenv shell
pipenv install django
pipenv install django-rest-framework
Right now, we’ve installed Django and Django REST Framework. Let’s create a Django project and a Django app:
./manage.py startproject subscription-api .
./manage.py startapp subscriptions
So make sure to add subscriptions and rest_framework to our list of INSTALLED_APPS in the settings.py file.
INSTALLED_APPS = [
  'django.contrib.admin',
  'django.contrib.auth',
  'django.contrib.contenttypes',
  'django.contrib.sessions',
  'django.contrib.messages',
  'django.contrib.staticfiles',
  'rest_framework',
  'subscriptions',
]
Our database model will contain Subscription model only. Let’s create 6 fields:
# subscriptions/models.py
from django.db import models


class Subscription(models.Model):
    name = models.CharField(max_length=255)
    description = models.TextField()
    currency = models.CharField(max_length=255)
    amount = models.IntegerField()
    created_at = models.DateTimeField(auto_now_add=True)
    updated_at = models.DateTimeField(auto_now=True)

    def __str__(self):
        return self.name
Now let’s update our database by first creating a new migration file and then applying it.
./manage.py makemigrations
./manage.py migrate
Create a serializer to convert our data into JSON format:
# subscriptions/serializers.py
from rest_framework import serializers
from .models import Subscription


class SubscriptionSerializer(serializers.ModelSerializer):
    class Meta:
        model = Subscription
        fields = ('name', 'description', 'currency',
            'amount', 'created_at', 'updated_at'
        )
Django REST Framework provides class-based generic API views. Update the views.py file:
# subscriptions/views.py
from .models import Subscription
from .serializers import SubscriptionSerializer
from rest_framework import generics


class SubscriptionList(generics.ListCreateAPIView):
    queryset = Subscription.objects.all()
    serializer_class = SubscriptionSerializer

class SubscriptionDetail(generics.RetrieveUpdateDestroyAPIView):
    queryset = Subscription.objects.all()
    serializer_class = SubscriptionSerializer
Let’s add our API endpoints.
# subscription_api/urls.py
from django.contrib import admin
from django.urls import path, include

urlpatterns = [
    path('api', include('subscriptions.urls')),
    path('admin/', admin.site.urls),
]
# subscriptions/urls.py
from django.urls import path
from rest_framework.urlpatterns import format_suffix_patterns
from subscriptions import views
urlpatterns = [
path('subscriptions/', views.SubscriptionList.as_view()),
path('subscriptions/<int:pk>/', views.SubscriptionDetail.as_view()),
]Start the server.
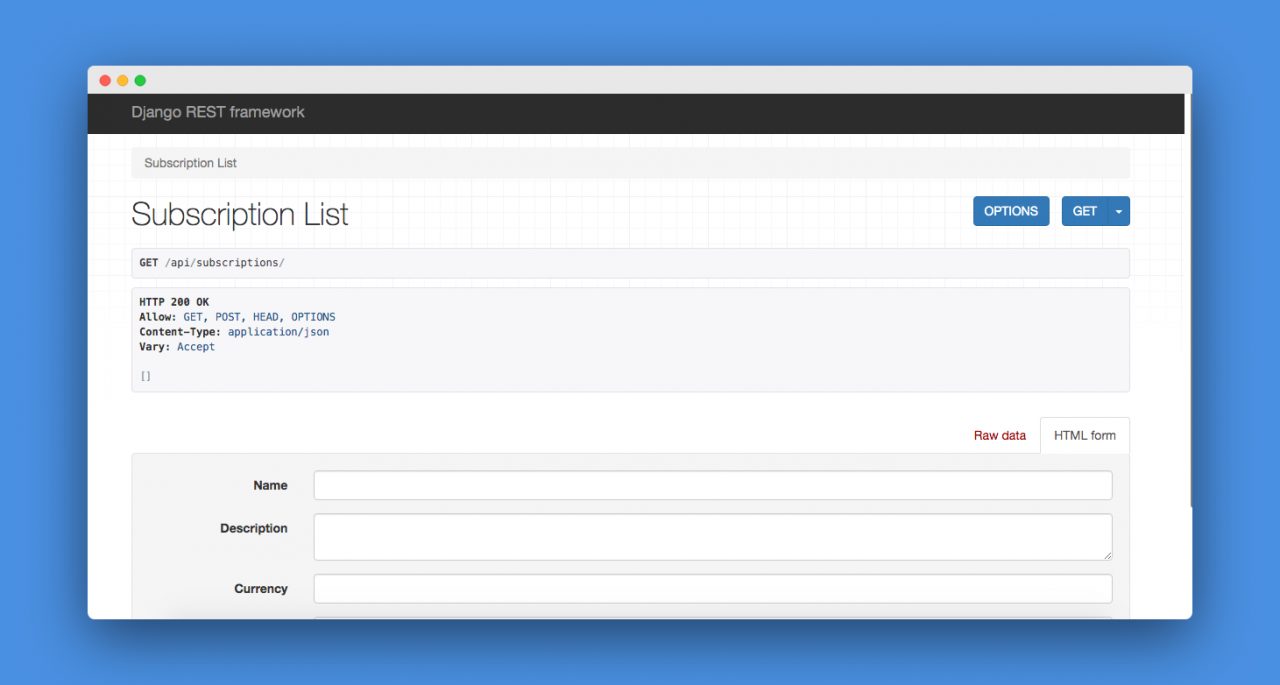
./manage.py runserverYour browsable API is ready.

Let’s add Cross-Origin Resource Sharing (CORS) headers to responses with django-cors-headers:
pipenv install django-cors-headersAnd then add it to your installed apps:
# subscription_api/settings.py
INSTALLED_APPS = [
    ...
    'corsheaders',
    ...
]
You will also need to add a middleware class to listen in on responses:
# subscription_api/settings.py
MIDDLEWARE = [
    ...
    'corsheaders.middleware.CorsMiddleware',
    'django.middleware.common.CommonMiddleware',
    ...
]
Just allow all origins to make cross-site HTTP requests:
# subscription_api/settings.py
CORS_ORIGIN_ALLOW_ALL = True
Vue.js CRUD REST API Consumption
Make sure you have the latest version of vue-cli installed.
vue create subscription-app
cd subscription-app
yarn add axios bootstrap bootstrap-vue vee-validate
We just create a new Vue.js project and installed:
axios: a great HTTP client library;bootstrapandbootstrap-vue: a library to quickly integrate Bootstrap 4 components with Vue.js;vue-validate: validate HTML inputs and Vue components the easy way.
Inside src/components folder, create the following Vue components:
Index.vueCreate.vueEdit.vue
Make sure to import bootstrap and vee-validate in your main.js:
// src/main.js
...
import BootstrapVue from "bootstrap-vue";
import VeeValidate from "vee-validate";

import "bootstrap/dist/css/bootstrap.min.css";
import "bootstrap-vue/dist/bootstrap-vue.css";

Vue.use(BootstrapVue);
Vue.use(VeeValidate);
...
Now, we need to define our routes.
import Vue from "vue";
import Router from "vue-router";

Vue.use(Router);

export default new Router({
  routes: [
    {
      path: "/",
      redirect: '/index'
    },
    {
      path: "/create",
      name: "create",
      component: () => import("./components/Create.vue")
    },
    {
      path: "/edit/:id",
      name: "edit",
      component: () => import("./components/Edit.vue")
    },
    {
      path: "/index",
      name: "index",
      component: () => import("./components/Index.vue")
    },
  ]
});
Each route should map to a component we created. We created a redirection to redirect from /to /index.
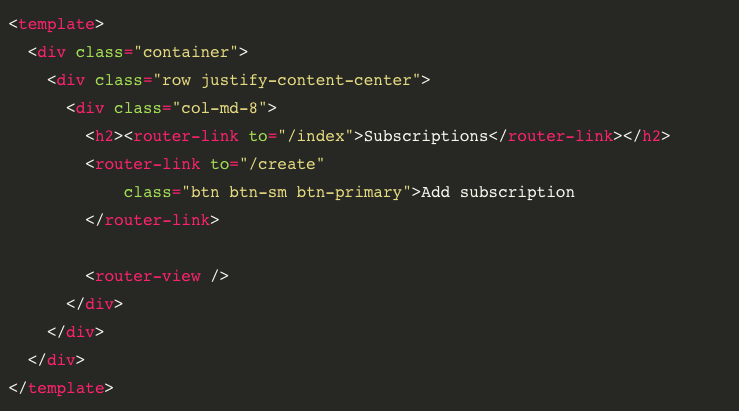
The next step should be to define a router view in App.vue file.

Index.Vue
So the first file called will be Index.vue. This component will display all subscriptions.
Let’s explain this deeper. We need to get all subscriptions from our API. Create a property called susbscriptions:
...
    data() {
        return {
            subscriptions: []
        }
    },
...
Create a method which gets all subscriptions from server with axios:
...
all: function () {
        axios.get('http://127.0.0.1:8000/api/subscriptions/')
            .then( response => {
                this.subscriptions = response.data
            });
    }
...
Call method when Index component is created:
...
created() {
    this.all();
},
...
The Index template part is just a Bootstrap card component with a for-loop.
We create a delete button into the template.
<button
    class="btn btn-danger btn-sm ml-1"
    v-on:click="deleteSubscription(subscription)">
    Delete
</button>
deleteSubscription is called when the button is clicked.
deleteSubscription: function(subscr) {
    if (confirm('Delete ' + subscr.name)) {
        axios.delete(`http://127.0.0.1:8000/api/subscriptions/${subscr.id}`)
            .then( response => {
                this.all();
            });
    }
},
This method will call your API after you confirm the deletion.
Create.vue
This file will create and store a subscription. We’ll use vee-validate which is a template-based validation library.
We create a property called subscription and a boolean called submitted:
...
subscription: {
    name: '',
    currency: '',
    amount: '',
    description: '',
},
submitted: false
...
All we need is to add the v-validate directive to the input we wish to validate. Like below:
<input
    type="text"
    class="form-control"
    id="name"
    v-model="subscription.name"
    v-validate="'required'"
    name="name"
    placeholder="Enter name">
The CSS class we bind is just a Bootstrap 4 HTML5 form validation hint wich display invalid-feedback block.
<input
...
    :class="{
        'is-invalid':
            errors.has('subscription.name')
        && submitted}">
So let’s store our subscription.
create: function (e) {
    this.$validator.validate().then(result => {
        this.submitted = true;
        if (!result) {
            return;
        }
        axios
            .post('http://127.0.0.1:8000/api/subscriptions/',
                this.subscription
            )
            .then(response => {
                this.$router.push('/');
            })
    });
}
We make a HTTP request and return to / path when everything works.
Edit.Vue
When the Edit.vue the component is loaded, then we fetch the subscription data from the database and then display it inside the same form we used in Create.vue.
Conclusion
I hope you learned a few things about Vue and Django. Every article can be made better, so please leave your suggestions and contributions in the comments below. If you have questions about any of the steps, please do ask also in the comments section below.
You can check out the subscription-app repo.
