Validating Vue.js Forms Using Vuelidate
Getting user input is crucial for many web apps as it enables the web app to give the user a more personalized experience. However, getting user input is not so straightforward because you have to:
- Make sure you are getting the right input from the user
- Make sure the input is in the correct format
Ensuring that the input given by a user is in the right format is known as Form validation. In this article, we’ll cover how to validate Vue.js forms using a library called Vuelidate.
Getting Started
Create a new Vue project by running the following command in your terminal:
vue create validate-vue-formsSelect the default settings and install the dependencies. After it’s done, switch to the project directory and install vuelidate like so:
yarn add vuelidateThen add it to your Vue app:
// main.js
import Vuelidate from ‘vuelidate’
Vue.use(Vuelidate)
Or you can import it directly in the components where it is required:
import { validationMixin } from 'vuelidate'

export default {
  ...
  mixins: [validationMixin],
  validations: { ... }
  ...
}
We’ll be importing it using the latter and importing vuelidate directly in our component.
Validating Form Fields
When validating forms, generally and in Vue.js, we need to define exactly what our needs are which would guide our validation logic. For the purposes of this tutorial, we’ll use a simple form. The form will contain the 3 fields:
- name
- website
We need to determine which fields will be required and which won’t be, the data type expected and conditions for what a “correct” input will be for each field. Let’s work with the following set of rules:
- name – is required and must be greater than 6 characters and less than 20 characters
- email – is required and must be a valid email (e.g. mail@example.com)
- website – is not required but if it’s entered, it must be a valid URL (e.g. http://example.com)
Let’s have a go at validating each field one after the other.
Validating the Name
Replace everything in App.vue with this:
<template>
  <div>

  </div>
</template>

<script>
  export default {

  }
</script>

<style scoped>

</style>
Add this to the component’s data properties:
data() {
  return {
    name: "",
    email: "",
    website: ""
  };
}
Import Vuelidate into the component like so:
import { validationMixin } from "vuelidate"For the name field, we want to make sure it’s required and have a minimum and maximum character length as defined above so let’s also import some builtin validators from vuelidate to help achieve this.
const {
  required,
  maxLength,
  minLength
} = require("vuelidate/lib/validators")
Add the validation as a mixin:
mixins: [validationMixin],With that, we can write the validation for the name field like so:
validations: {
  name: {
    required,
    minLength: minLength(6),
    maxLength: maxLength(20)
  }
}
The code is quite straightforward. Just as we described earlier, we want the name field to be required, have a minimum character length of 6 and a maximum character length of 20. That’s all this code does.
We can now use this to validate the input field in realtime like so:
<div class="form-group">
  <input type="text" placeholder="Name" v-model.trim="$v.name.$model">
  <div class="error" v-if="name.length && !$v.name.required">Name is required</div>
  <div
    class="error"
    v-if="!$v.name.minLength"
  >Name must have at least {{$v.name.$params.minLength.min}} letters.</div>
  <div
    class="error"
    v-if="!$v.name.maxLength"
  >Name must have at most {{$v.name.$params.maxLength.max}} letters.</div>
</div>
vuelidate exposes $v which can be used anywhere in the component to check the current validation state of the data. v-model.trim="$v.name.$model" binds the form input to the name data.
<div class="error" v-if="name.length && !$v.name.required">Name is required</div>Displays an error to let the user know this is a required field.
<div
  class="error"
  v-if="!$v.name.minLength"
>Name must have at least {{$v.name.$params.minLength.min}} letters.</div>
<div
  class="error"
  v-if="!$v.name.maxLength"
>Name must have at most {{$v.name.$params.maxLength.max}} letters.</div>
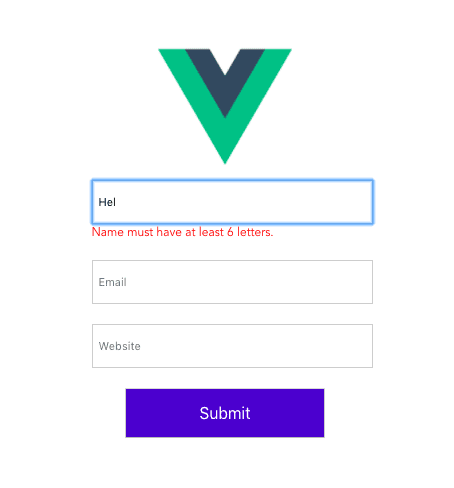
Let’s the user know the minimum and maximum characters required by the name field. Here’s the result:

Validating the Email
The process is quite similar but for the email field, we have to validate that it’s an actual email. We could write a regular expression that validates this or we can take advantage of a well-tested library like vuelidate. We’ll update the validations imports to include the email validator:
const {
  required,
  email,
  maxLength,
  minLength
} = require("vuelidate/lib/validators")
We add email to the validations:
validations: {
  ...
  email: {
    required,
    email
  },
  ...
}
This makes the email field required as well as validate the input. For the email field, the markup will look like:
<div class="form-group">
  <input type="email" placeholder="Email" v-model.trim="email">
  <div class="error" v-if="email.length && !$v.email.required">Email is required</div>
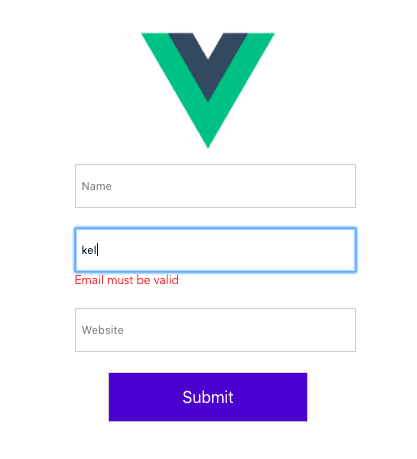
  <div class="error" v-if="!$v.email.email">Email must be valid</div>
</div>
It’s quite similar to the name field but here we check if the email is valid (v-if="!$v.email.email) and display an error message to let the user know if it’s not.

Validating the Website
The previous 2 fields were required fields but the website field is not required. At the same time, we must make sure it is a valid URL if a value is entered. We’ll use the built-in url validator so update the validation imports like so:
const {
  required,
  url,
  email,
  maxLength,
  minLength
} = require("vuelidate/lib/validators")
Then use it like so:
validations: {
  ...
  website: {
    url
  }
}
Notice this time we don’t use the required validator since the website field is not a required field. The markup for the website field is:
<div class="form-group">
  <input type="text" placeholder="Website" v-model.trim="website">
  <p class="error" v-if="!$v.website.url">Website must be a valid URL</p>
</div>
It’s quite similar to the email markup but this time, we check that the website is indeed a URL (!$v.website.url).
Programmatically Validate Forms
Sometimes you may not want to validate the form in realtime and only validate when the user tries to submit the form. Vuelidate also allows you to do this:
methods: {
  onSubmit() {
    this.$v.$touch();
    if (this.$v.$invalid) {
      alert("Please complete all field correctly");
    }
  }
}
You can validate the form by calling this.$v.$touch() in your submit handler. If any of the fields does not pass the validation, then this.$v.$invalid is set to true so you can then prompt the user to crosscheck the data they entered.
Custom Validation with Vuelidate
So far, we have used built-in validations provided by vuelidate and while they are great, they don’t cover every possible use-case. vuelidate allows us to write our own custom validation logic in a way that it can be easily used just like the built-in validation. The key thing is that your validation function should return true/false.
For example, let’s say we have an array and we wanted to validate that the array is not empty. One way to do that will be to check the length of the array:
const validArray = item => item.length > 0We could then use this method like the built-in validation like so:
validations: {
  users: {
    validArray
  }
}
As long as your custom validation returns true/false, it will integrate nicely with vuelidate.
Conclusion
In this article, we’ve seen how to use vuelidate to seamlessly validate forms in Vue. While client-side form validation is good, it’s by no means bullet-proof and it should always be backed up by server-side validation. If you feel like comparing notes, check out my codesandbox.
