Setting up Google Authentication in a Kotlin Android App
Have you ever needed to sign in to an Application or website that you weren’t signed up on? and felt frustrated at having to type your details over again, I’m sure that anyone who uses the internet has at one time or the other been in this dilemma.
Likewise, we’ve also seen some platforms use google authentication and employ a google sign in button on their websites or applications to make authentication very easy.
In this tutorial, we are going to be learning how to add the Google Authentication in a Kotlin Android App for a more flexible user experience.
Most Apps needs to authenticate the identity of a user in order to securely persist user’s data in the cloud and provide the same personalized experience across all of the user’s devices.
Firebase Authentication is a Backend service provided by Google to enable developers to manage their backend, without having to create libraries for it, It also affords developers easy-to-use SDKs, and ready-made UI libraries to authenticate users to your app.
It supports authentication using passwords, phone numbers, popular federated identity providers such as Google, Facebook, Twitter and lots more.
Nowadays, as a developer, leveraging on the tools and features made by others is a way of reducing the boiler plate code and increasing efficiency by saving us time and effort while ensuring productivity.
In Android Development, the Library ecosystem is as useful as anything an android developer would need in order to be successful.
Also, knowing how to use libraries will make your working experience less cumbersome.
For this particular tutorial, we’ll be needing the following
REQUIREMENTS
- A Fair Knowledge of developing android apps
- Android Studio(3.0 or higher)
- A Mobile Phone for testing or an emulator
- Internet Connectivity
You can Check source code if you want to refer to it or take a peek as we get started.
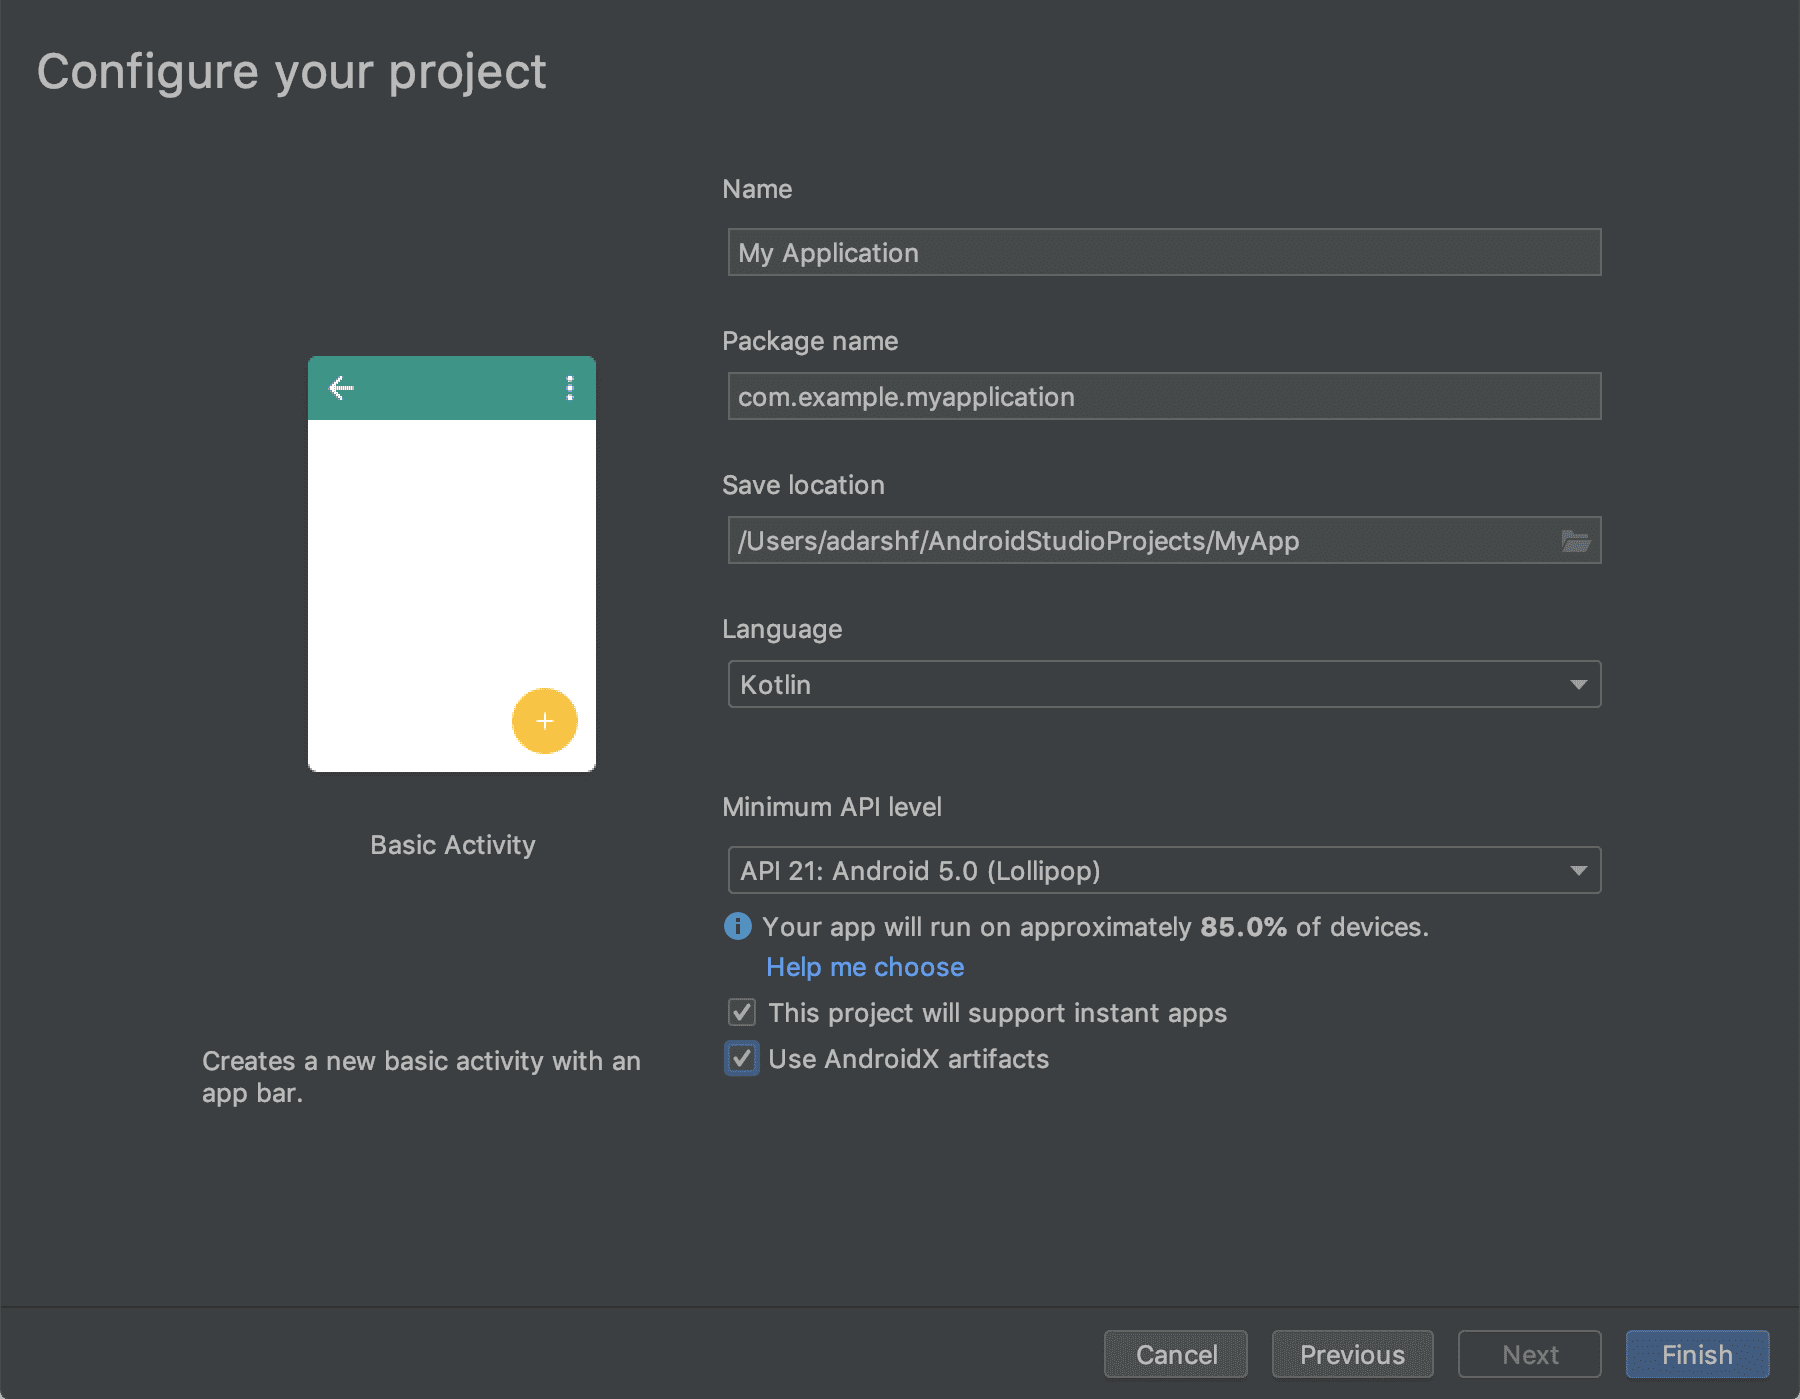
1.First off, we’ll start by creating a new android studio project and give it any name of our choice, then wait for a successful build.
Adding Firebase to your Project
Then we’ll head over Google Firebase Console to create a project.
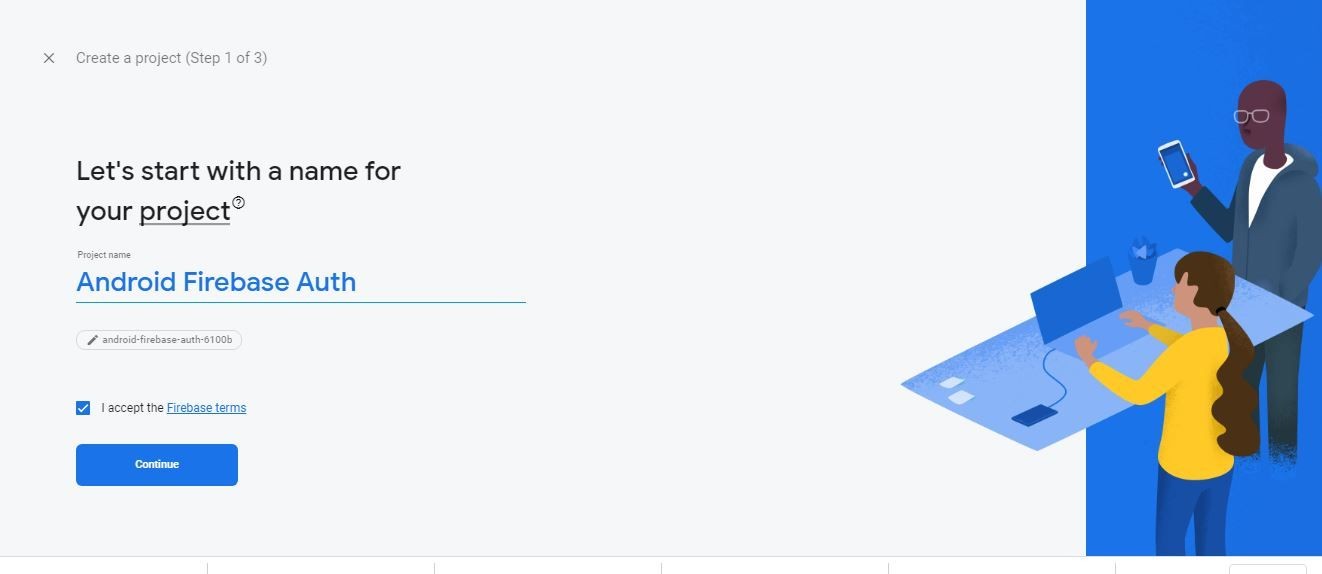
- Click on “Add Project”
- Enter your Project Name and click on the checkbox below it to accept the terms and conditions
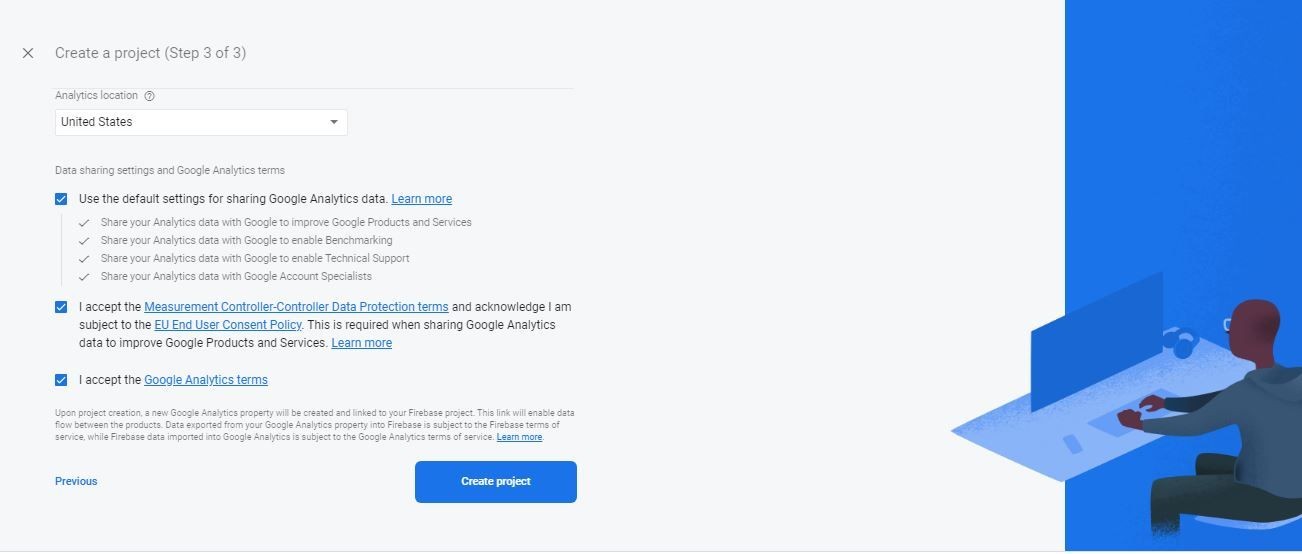
Click Continue on the prompt and on the next screen select your country and check the remaining boxes to successfully create your project.
After that you’ll be greeted with a success message.
The next step once our dashboard opens up is to click on the android icon to register an application.

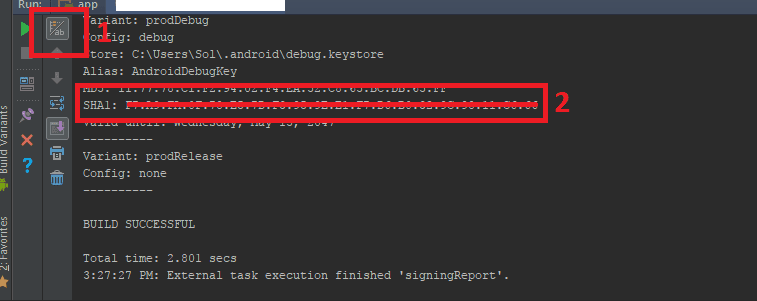
- Here on this new page, you will need to register your application by providing your android package name and SHA-1 key for your machine. I’ll show you how to achieve this quickly, for those that have no idea how to go around this.
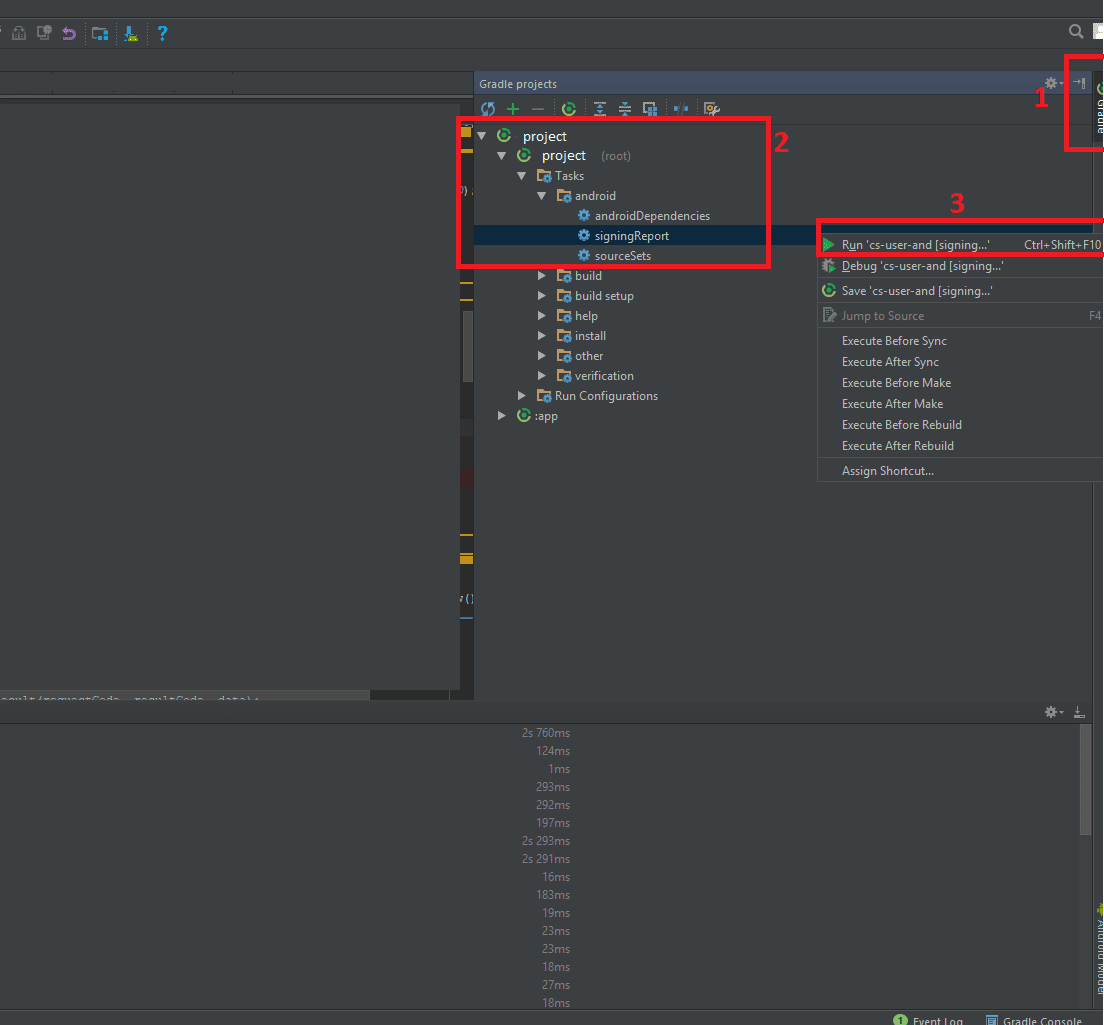
- To get your android package name in android studio, just open your application’s build.gradle file. It should look something like this in the image below
The highlighted string of alphanumeric characters is your SHA-1 key.
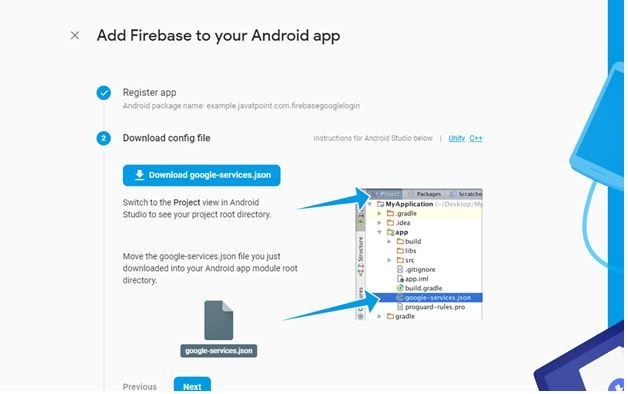
- After that, download the ‘google-servicces.json‘ file and add it to your project’s android app module root project folder.
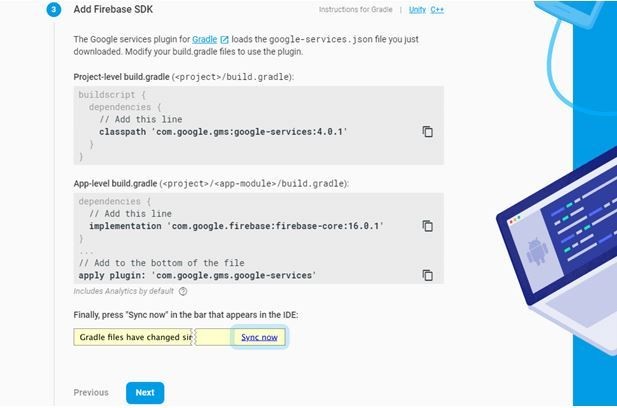
The next step will be to copy and add the necessary dependencies for your Firebase SDK to our gradle file and sync our project again and click NEXT.
- After this, we can check our manifest to verify that we have internet permissions added. If not, simply copy and paste the line of code below.
<uses-permission android:name="android.permission.INTERNET" />
- After this we should go ahead to run our application in order to verify that our setup was successful. After this we can now continue to our Firebase console.
- On the Firebase click on Authentication => Sign-in Method => Select Google and Enable, then save.
- Finally Before leaving, we should copy our ‘web client secret’ and save it in our strings resources. It should be saved as ‘web_client_id’
After a successful build of our project, we can go ahead to write down the code that will initialize and initiate the Google Login on our Application.
Build A Simple User Interface
We’ll start our coding by building out a simple UI for our Application. Our UI for now will basically contain a single button with a google logo, which will serve to trigger Google Login whenever the user clicks on it, as we can see below.
To achieve this, simply add the following code to your “activity_main” layout xml file.
<?xml version="1.0" encoding="utf-8"?>
<androidx.constraintlayout.widget.ConstraintLayout

 xmlns:android="http://schemas.android.com/apk/res/android"
    xmlns:tools="http://schemas.android.com/tools"
    xmlns:app="http://schemas.android.com/apk/res-auto"
    android:layout_width="match_parent"
    android:layout_height="match_parent"
    tools:context=".MainActivity">

    <com.google.android.gms.common.SignInButton
        android:id="@+id/google_button"
        android:layout_width="wrap_content"
        android:layout_height="wrap_content"
        android:layout_margin="8dp"
        android:padding="8dp"
        app:layout_constraintBottom_toBottomOf="parent"
        app:layout_constraintEnd_toEndOf="parent"
        app:layout_constraintStart_toStartOf="parent"
        app:layout_constraintTop_toTopOf="parent" />

</androidx.constraintlayout.widget.ConstraintLayout>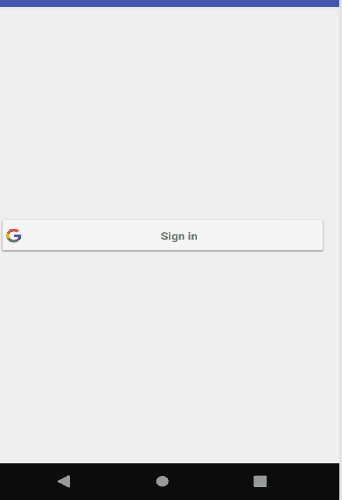
Add the following code your “strings.xml”<string name="title_activity_logged_in">Authenticated</string>
Create another Activity called “LoggedInActivity” and this activity should be a navigation drawer activity. To do this, simply click on your activity package in the android view section and select New => Activity => Navigation Drawer Activity and enter the name of your Activity and click okay.
In our new activity, head over to the “content_logged_in” and paste the following to get a simple ui with a welcome message for each successful login.
<?xml version="1.0" encoding="utf-8"?>
<androidx.constraintlayout.widget.ConstraintLayout xmlns:android="http://schemas.android.com/apk/res/android"
    xmlns:app="http://schemas.android.com/apk/res-auto"
    xmlns:tools="http://schemas.android.com/tools"
    android:layout_width="match_parent"
    android:layout_height="match_parent"
    app:layout_behavior="com.google.android.material.appbar.AppBarLayout$ScrollingViewBehavior"
    tools:context=".LoggedInActivity"
    tools:showIn="@layout/activity_logged_in">


    <TextView
        android:id="@+id/textView"
        android:layout_width="wrap_content"
        android:layout_height="wrap_content"
        android:layout_marginStart="8dp"
        android:layout_marginTop="8dp"
        android:layout_marginEnd="8dp"
        android:gravity="center"
        android:text="Congratulations, You are currently Signed In"
        app:layout_constraintBottom_toTopOf="@+id/sign_out_button"
        app:layout_constraintEnd_toEndOf="parent"
        app:layout_constraintStart_toStartOf="parent"
        app:layout_constraintTop_toTopOf="parent" />

    <Button
        android:id="@+id/sign_out_button"
        android:layout_width="wrap_content"
        android:layout_height="wrap_content"
        android:layout_marginStart="8dp"
        android:layout_marginEnd="8dp"
        android:layout_marginBottom="36dp"
        android:text="Click Here to Logout"
        app:layout_constraintBottom_toBottomOf="parent"
        app:layout_constraintEnd_toEndOf="parent"
        app:layout_constraintStart_toStartOf="parent" />

</androidx.constraintlayout.widget.ConstraintLayout>
Integrate Google Sign In
- To integrate Google Sign In from here, We are going to start by creating a FirebaseAuth object and initialize it in our onCreate. Initializing a google FirebaseAuth instance just requires getting its Instance as shown in the code below.
private lateinit var auth: FirebaseAuth
auth = FirebaseAuth.getInstance()
It is usually best practice to always ensure that there are no multiple instances of our Auth object running at the same time, to achieve this we check if there are any current instances of Firebase Auth Object running in our application already, and this is usually most done in our OnStart Method. This can be done using the code below
override fun onStart() {
    super.onStart()
    val user = FirebaseAuth.getInstance().currentUser
    if (user != null) {
        startActivity(LoggedInActivity.getLaunchIntent(this))
        finish()
    }
}
Next add the following method to your code. The function of this method is to request the user data which your app might require, such as the users’ ID and basic profile information, email address or Id token. After creating this method, we are going to call it in our onCreate.
private fun setupGoogleLogin() {
    signInOptions = GoogleSignInOptions.Builder(GoogleSignInOptions.DEFAULT_SIGN_IN)
        .requestIdToken(getString(your_default_web_client_id))
        .requestEmail()
        .build()
    signInClient = GoogleSignIn.getClient(this, signInOptions)
}
We also add another method to initialize our UI and setup onClick Listeners on the button in our main Activity.
private fun initializeUI() {
    google_button.setOnClickListener {
        login()
    }
}
Subsequently, we are going to add a method to start the login process, which will be called when the user clicks on the log in button. The user will then be asked to select an account for authentication. The signInIntent will be used to handle the process of signing in and also the startActivityForResult() is used.
private fun login() {
    val loginIntent: Intent = signInClient.signInIntent
    startActivityForResult(loginIntent, RC_SIGN_IN)

}
After the login method is invoked the onActivityResult() is called. Here, the selected authentication account is retrieved and sent to Firebase to complete the authentication process.
override fun onActivityResult(requestCode: Int, resultCode: Int, data: Intent?) {
    super.onActivityResult(requestCode, resultCode, data)
    if (requestCode == RC_SIGN_IN) {
        val task: Task<GoogleSignInAccount> = GoogleSignIn.getSignedInAccountFromIntent(data)
        try {
            val account = task.getResult(ApiException::class.java)
            if (account != null) {
                googleFirebaseAuth(account)
            }
        } catch (e: ApiException) {
            Toast.makeText(this, "Google sign in failed:(", Toast.LENGTH_LONG).show()
        }
    }
}
After a user is successfully logged in, the next method gets an ID token from the GoogleSignInAccount object, and exchanges it for a Firebase credential, and also authenticate with Firebase using the obtained Firebase credential.
private fun googleFirebaseAuth(acct: GoogleSignInAccount) {
    val credential = GoogleAuthProvider.getCredential(acct.idToken, null)
    auth.signInWithCredential(credential).addOnCompleteListener {
        if (it.isSuccessful) {

            startActivity(LoggedInActivity.getLaunchIntent(this))
        } else {
            Toast.makeText(this, "Google sign in failed:(", Toast.LENGTH_LONG).show()
        }
    }
}
Next we are going to create a companion Object. The job of this companion object is to help open this sign in intent.
companion object {
    fun getLaunchIntent(from: Context) = Intent(from, MainActivity::class.java).apply {
        addFlags(Intent.FLAG_ACTIVITY_NEW_TASK or Intent.FLAG_ACTIVITY_CLEAR_TASK)
    }
}
The complete code snippet for our main Activity should now look like this.
package com.example.googleauth

import android.content.Context
import android.content.Intent
import androidx.appcompat.app.AppCompatActivity
import android.os.Bundle
import android.widget.Toast
import com.google.android.gms.auth.api.signin.*
import com.google.android.gms.common.api.ApiException
import com.google.android.gms.tasks.Task
import com.google.firebase.auth.FirebaseAuth
import com.google.firebase.auth.GoogleAuthProvider
import kotlinx.android.synthetic.main.activity_main.*


class MainActivity : AppCompatActivity() {

    val RC_SIGN_IN: Int = 1
    lateinit var signInClient: GoogleSignInClient
    lateinit var signInOptions: GoogleSignInOptions
    private lateinit var auth: FirebaseAuth


    override fun onCreate(savedInstanceState: Bundle?) {
        super.onCreate(savedInstanceState)
        setContentView(R.layout.activity_main)
        auth = FirebaseAuth.getInstance()
        initializeUI()
        setupGoogleLogin()

    }

    companion object {
        fun getLaunchIntent(from: Context) = Intent(from, MainActivity::class.java).apply {
            addFlags(Intent.FLAG_ACTIVITY_NEW_TASK or Intent.FLAG_ACTIVITY_CLEAR_TASK)
        }
    }


        override fun onStart() {
        super.onStart()
        val user = FirebaseAuth.getInstance().currentUser
        if (user != null) {
            startActivity(LoggedInActivity.getLaunchIntent(this))
            finish()
        }
    }

    private fun initializeUI() {
        google_button.setOnClickListener {
            login()
        }
    }

    private fun login() {
        val loginIntent: Intent = signInClient.signInIntent
        startActivityForResult(loginIntent, RC_SIGN_IN)

    }

    override fun onActivityResult(requestCode: Int, resultCode: Int, data: Intent?) {
        super.onActivityResult(requestCode, resultCode, data)
        if (requestCode == RC_SIGN_IN) {
            val task: Task<GoogleSignInAccount> = GoogleSignIn.getSignedInAccountFromIntent(data)
            try {
                val account = task.getResult(ApiException::class.java)
                if (account != null) {
                    googleFirebaseAuth(account)
                }
            } catch (e: ApiException) {
                Toast.makeText(this, "Google sign in failed:(", Toast.LENGTH_LONG).show()
            }
        }
    }

    private fun googleFirebaseAuth(acct: GoogleSignInAccount) {
        val credential = GoogleAuthProvider.getCredential(acct.idToken, null)
        auth.signInWithCredential(credential).addOnCompleteListener {
            if (it.isSuccessful) {

                startActivity(LoggedInActivity.getLaunchIntent(this))
            } else {
                Toast.makeText(this, "Google sign in failed:(", Toast.LENGTH_LONG).show()
            }
        }
    }

    private fun setupGoogleLogin() {
        signInOptions = GoogleSignInOptions.Builder(GoogleSignInOptions.DEFAULT_SIGN_IN)
            .requestIdToken(getString(R.string.default_web_client_id))
            .requestEmail()
            .build()
        signInClient = GoogleSignIn.getClient(this, signInOptions)
    }


}
We are simply going to move to our next Activity and add the following code, which will be explained below.
package com.example.googleauth

import android.content.Context
import android.content.Intent
import android.os.Bundle
import com.google.android.material.snackbar.Snackbar
import androidx.appcompat.app.AppCompatActivity
import com.google.firebase.auth.FirebaseAuth

import kotlinx.android.synthetic.main.activity_logged_in.*
import kotlinx.android.synthetic.main.content_logged_in.*

class LoggedInActivity : AppCompatActivity() {
    companion object {
        fun getLaunchIntent(from: Context) = Intent(from, LoggedInActivity::class.java).apply {
            addFlags(Intent.FLAG_ACTIVITY_NEW_TASK or Intent.FLAG_ACTIVITY_CLEAR_TASK)
        }
    }

    override fun onCreate(savedInstanceState: Bundle?) {
        super.onCreate(savedInstanceState)
        setContentView(R.layout.activity_logged_in)
        setSupportActionBar(toolbar)

        initializeUI()

        fab.setOnClickListener { view ->
            Snackbar.make(view, "Replace with your own action", Snackbar.LENGTH_LONG)
                .setAction("Action", null).show()
        }
    }

    private fun initializeUI() {
        sign_out_button.setOnClickListener {
            logout()
        }
    }

    private fun logout() {
        startActivity(MainActivity.getLaunchIntent(this))
        FirebaseAuth.getInstance().signOut();
    }

}
In the above code, we have our companion object, to help us with the Intent back to our MainActivity. We also have a new method which helps with Logout, by calling the Firebase Logout child object on our Authentication object.
With this you can simply run and test your app, and everything should work just fine. You just succeded in building an application that uses Google Authentication in Kotlin.
Final Thoughts
Utilizing the Google Authentication (Kotlin) for our apps has some of the following benefits
- Users do not need to create another account and remember or manage yet another password.
- Users are able to manage access to their account.
- There are many libraries that make implementing OAuth2 signin with these providers fairly straightforward.
- The app does not need to store passwords which means fewer things to secure.
If you found this post on how to build a signature capture application informative or have a question do well to drop a comment below and don’t forget to share with your friends.

