MEVN stack tutorial – Building a CRUD app using mongo, express, vue3 and nodejs
In this tutorial, we will create a MEVN stack application using mongo, express, vue3, and nodejs. In our node API, we will be able to perform create, read, update and delete operations.
At the end of the tutorial, readers should be able to create a CRUD app with node,
connect nodejs server to backend and consume the API with vuejs frontend
Building our app
First, we create our project folder, name it quote-app , then in our quote-app directory, we create our backend folder, name it backend. In our backend folder, we run
npm init -yinitializing our package.json file.
Installing dependencies
For our server we need to install express, bodyparser, mongoose and cors.
npm install express body-parser mongoose cors --saveinstall nodemon
yarn add -D nodemonand in the package.json script add
"start": "nodemon app.js"In our backend folder, we create a file named app.js and in that file we require express, mongoose and bodyparser.
we iniatilize our express app then listen at port 3000 for any incoming request.
const express = require("express")
const mongoose = require("mongoose")
const bodyParser = require("body-parser")
// create our express app
const app = express()
// middleware
app.use(bodyParser.json())
// routes
app.get("/", (req,res)=>{
    res.send("my home page dey show sha")
})
//start server
app.listen(3000, ()=>{
    console.log("listeniing at port:3000")
})
Connecting our database
We are going to be using mongodb atlas instead of downloading it locally. You first have to create an account on their site. Then create a cluster, choose the free tier cluster, then create the cluster. You can choose to change the cluster name. Click on create cluster, and you will be taken to another page. In this page, under your cluster name, click on the connect button and follow the steps and you will get your connection string that can be used to connect to the application.
For detailed explanation on how to setup your cluster, go here.
In our app.js after our dependencies have been required, copy and paste the following code to connect our database.
const uri = "mongodb+srv://<cluster-username>:<user-password>@quote-app.ba0sr.mongodb.net/myFirstDatabase?retryWrites=true&w=majority";
mongoose.connect(uri, {
    useNewUrlParser: true,
    useUnifiedTopology: true
  })
  .then(() => {
    console.log('MongoDB Connected')
  })
  .catch(err => console.log(err))
In place of <cluster-username>should be the name of the user you set for that cluster and in place of <user-password> should be the password for the user.
Now if we start our server with npm start we would see the message MongoDB Connected.
Creating our routes
Let’s create our quotes route first by creating a route folder in our root directory, then in the route folder we create a Quotes.js file for our Quote route, then back in our app.js, we require the quote route and use it. All routes created in our Quote route will now have /Quote prepended to it.
const QuotesRoute = require('./routes/Quotes')
app.use('/quotes', QuotesRoute)
In our Quote.js file, we require express again and define our express router. we also create an all quotes route that fetches all our quotes.
const express = require('express')
const router = express.Router()

// all routes
router.get('/', (req,res)=>{
    res.send("Our quotes route")
})
The '``/``' route will automatically default to the /quotes route we setup to be used by express in app.js file.
The post route is then created
router.post('/new', (req,res)=>{
    res.send('posted info')
})
but if we are posting to the route specified above we need to create a model in our database. We create a folder in the root of our app named models and in it we create a file Quotes.js to create our model.
In the Quotes.js file, we import mongoose again, create our schema. Schemas are like rules as to what we can store in our database collection. So we create our quotes schema and pass it some rules, setting content and author to be strings. Exporting our model and giving it a name of quotes
const mongoose = require('mongoose')
const QuotesSchema = new mongoose.Schema({
    content: String,
    author: String,
})
module.exports = mongoose.model('quote', QuotesSchema)
We import our mongo schema we just created at the top of our Quotes.js file in our route folder.
const Quote = require('../models/Quotes');Create new quote.
In our post route in routes folder, we create a new quote and pass in the body content using req.body to be stored in the database. Then we save the data in our database and respond with json to our post endpoint.
Note: You can use Postman to make sure all routes are working.
router.post('/new', async(req,res)=>{
    const newQuote = new Quote(req.body);
    const savedQuote = await newQuote.save()
    res.json(savedQuote)
})
we use async/await, because saving data to a database is an operation that takes sometime and we don’t want our code to be blocking.
We create a newQuote variable containing our new quote and use mongoDB save() method to save our quote
Get specific quote
When we create a new post and save it in our database, it is assigned an id to uniqely identify the quote saved. We can create a route that gets a quote by its id
// Get specific quote
router.get('/get/:id', async (req, res) => {
    const q = await Quote.findById({ _id: req.params.id });
    res.json(q);
});
Using the get request, we make a request to the get route that has a dynamic :id prepended to it. mongoDB findById method takes in the id as an argument and finds any quote that has the id and returns it,saving it to a variable q, then we respond with json.
Get random quote
To get a random quote from our saved quotes, we use mongo countDocuments method to calculate the number of quotes we have, then we create the random variable using findOne().skip(random) to return random quotes in our saved quotes.
// Get random quote
router.get('/random', async (req, res) => {
    const count = await Quote.countDocuments();
    const random = Math.floor(Math.random() * count);
    const q = await Quote.findOne().skip(random);
    res.json(q);
});
Update and delete quote
We have made use of the get and post request so far, we would now see how to delete and update a request using update and delete request.
We create a delete route containing the dynamic id. We then use mongo findByIdAndDelete method to find the quote id and delete it when found.
Then to update a quote we have already saved, we use the patch function and updateOne method to update the quote specified.
// Delete a quote
router.delete('/delete/:id', async (req, res) => {
    const result = await Quote.findByIdAndDelete({ _id: req.params.id });
    res.json(result);
});
// Update a quote
router.patch('/update/:id', async (req, res) => {
    const q = await Quote.updateOne({_id: req.params.id}, {$set: req.body});
    res.json(q);
});
Now we are done with creating all our routes. We can now start building the frontend.
Setting up our frontend
You can start a new project using the vue cli but you have to install the cli first by running-
npm install -g @vue/cli
 OR
yarn global add @vue/cli
after the cli is installed you can create a new project by running-
vue create <project-name>you will then be prompted to select some basic setup. In your setup, select vue router, store and vue3.
You can setup tailwindcss by following the official documentation here.
In our views folder in src we delete the About.vue, then delete the About route in our routes folder, also the Helloworld component should be deleted as we won’t be using it.
Set up Vuex store
We are going to add two states in our vuex store:
quotestate that we will display on our home pagequotesstate that is an array containing all our quotes fectched from the server
In our mutations we create GetRandomQuote and GetAllQuotes mutations. The GetRandomQuote mutation makes a request to our random route and and checks if the random quote matches any of the already existing code. If it does’nt, it stores it in the quote state, but if it does, it runs the GetRandomQuote mutation again.
The GetAllQuotes mutation just fetches all the qoutes, and stores it in our quotes array.
While in our getters we have GetSpecificQuote that filters through the quotes to get our specified id
import { createStore } from 'vuex'
export default createStore({
  state: {
    quote: {},
    quotes: []
  },
  mutations: {
    GetRandomQuote (state) {
      fetch("http://localhost:3000/quotes/random")
        .then(res => res.json())
        .then(data => {
          if (state.quote._id != data._id) {
            state.quote = data;
          } else {
            this.commit('GetRandomQuote');
          }
        });
    },
    GetAllQuotes (state) {
      fetch("http://localhost:3000/quotes")
        .then(res => res.json())
        .then(data => {
          state.quotes = data;
        });
    }
  },
  getters: {
    GetSpecificQuote: state => id => {
      return state.quotes.filter(q => q._id == id)[0]
    }
  }
})
Set up our Route
So in our application, we have three views
Home.vuethat contains a button that when clicked on displays random quotesAll.vuethat contains all our quotesQuote.vuethat contains detail of any quote we clicked on in theHome.vue
In our Views folder we make sure to create all the views we just listed above.
So our routes in the index.js of our route folder looks like this
import { createRouter, createWebHistory } from "vue-router";
import Home from "../views/Home.vue";
import All from "../views/All.vue";
import Quote from "../views/Quote.vue";
const routes = [
  {
    path: "/",
    name: "Home",
    component: Home,
  },
  {
    path: "/all",
    name: "All",
    component: All
  },
  {
    path: "/quote/:id",
    name: "single quote",
    component: Quote
  }
];
const router = createRouter({
  history: createWebHistory(process.env.BASE_URL),
  routes,
});
export default router;
So in our App.vue we set our Home and All quotes route. Once the components mount, we would like to get all our quotes, so we import useStore and onMounted from vuex since we are using the composition API instead of options API. In our setup function, we commit the GetAllQuotes mutation.
<template>
<div>
  <div class="p-3">
    <div class="mx-auto max-w-screen-lg flex items-center justify-center">
      <router-link to="/" class="mx-2 btn">Home</router-link>
      <router-link to="/all" class="mx-2 btn">All Quotes</router-link>
    </div>
  </div>
  <router-view />
</div>
</template>
<style>
#app {
  font-family: Avenir, Helvetica, Arial, sans-serif;
  -webkit-font-smoothing: antialiased;
  -moz-osx-font-smoothing: grayscale;
  text-align: center;
  color: #2c3e50;
}
#nav {
  padding: 30px;
}
#nav a {
  font-weight: bold;
  color: #2c3e50;
}
#nav a.router-link-exact-active {
  color: #42b983;
}
.btn{
  @apply border-2 border-transparent bg-green-500 ml-3 py-2 px-4 font-bold uppercase text-white rounded transition-all hover:border-green-500 hover:bg-transparent hover:text-green-500
}
</style>
<script>
import { useStore } from 'vuex';
import { onMounted } from 'vue';
export default {
  setup () {
    const store = useStore();
    onMounted(() => {
      store.commit('GetAllQuotes');
    });
  }
}
</script>
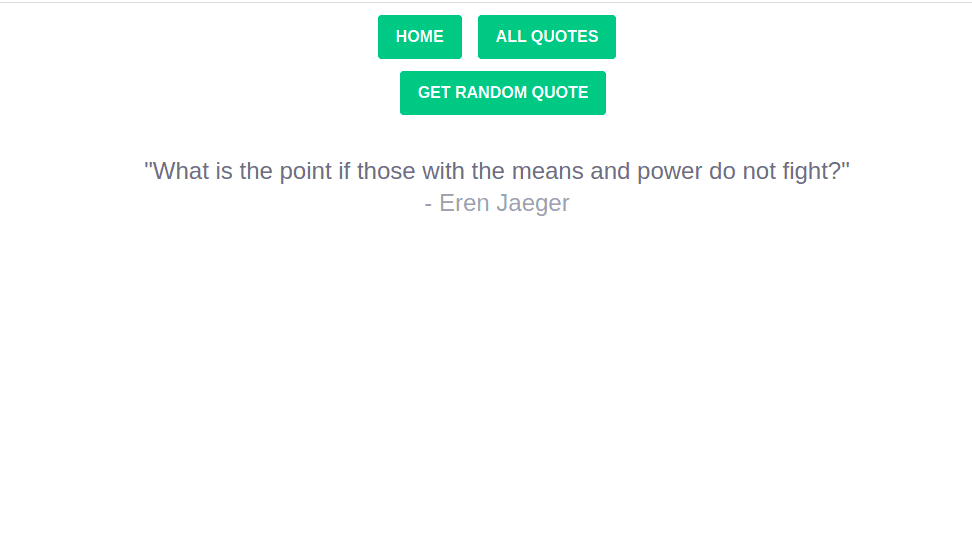
So if we navigate to our home page, we want to see a get random quote button that when clicked displays random quotes. We add our click handler to the button that commits the GetRandomQuote function in our vuex methods. We then output the content and author from our store.
<template>
  <div class="home">
    <div class="mx-auto max-w-screen-lg">
      <div class="flex items-center flex-col justify-center">
        <div class="btn" @click="$store.commit('GetRandomQuote')">Get Random Quote</div>
        <p
          class="mb-6 my-10 text-2xl text-center text-gray-500"
          v-if="typeof $store.state.quote._id != 'undefined'">
          <span>"{{ $store.state.quote.content }}"</span><br>
          <span class="text-gray-400">- {{ $store.state.quote.author }}</span>
        </p>
      </div>
    </div>
  </div>
</template>
Our app now looks like this:

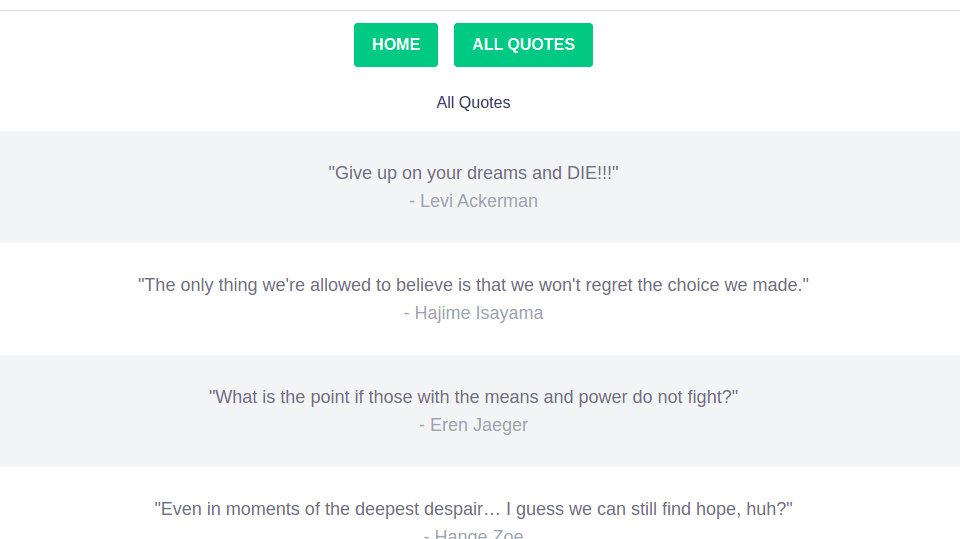
Over in our All Quotes route, we want to be able to display all the quotes, we have saved in our database. So what we do is we create our router-link and in our router link, we loop over our quotes array and set our :key to our quote id. Then the actual routing to the quote/quote_id. For the styling we want to change the background of our quote depending on if its id positioning in the array is even or not. Then we output the content and author of that particular quote.
<template>
    <div class="p-3">
    <div class="mx-auto max-w-screen-lg">
        <h1>All Quotes</h1>
         <div class="py-4">
            <router-link
                v-for="(quote, i) in $store.state.quotes"
                :key="quote._id"
                :to="`/quote/${quote._id}`">
                    <div :class="`quote py-2 ${(i % 2 == 0 ? 'bg-gray-100' : '')}`">
                        <p class="my-5 text-lg text-center text-gray-500">
                            <span>"{{ quote.content }}"</span><br>
                            <span class="text-gray-400">- {{ quote.author }}</span>
                        </p>
                    </div>
            </router-link>
        </div>
    </div>
    </div>
</template>
This is what our all quotes route now look like:

Our quote view
In our quote view we want to display any quote we click on in the all quote page on another page. So first we import useRoute from our router which allows us information from our router. Then useStore from the store and ref , onMounted from vue.
We create our setup method, and in it we assign route, store to useRoute and useStore respectively. Then our quote variable is set using our reactive reference (ref). When the component is mounted,we create a setTimeout and the reason for this is so that we can wait a little for our Quotes to be available in our state. Our qoute.value is set to our GetSpecificQuote function in our vuex getter, where we pass in our router.params.id, then we return our quote.
<template>
    <div class="py-3">
        <div class="mx-auto max-w-screen-lg">
            <h1 class="text-3xl text-center">{{ quote.author }}</h1>
            <p class="my-5 text-2xl text-center text-gray-500">
                "{{ quote.content }}"
            </p>
        </div>
    </div>
</template>
<script>
import { useRoute } from 'vue-router';
import { useStore } from 'vuex';
import { ref, onMounted } from 'vue';
export default {
    setup () {
        const route = useRoute();
        const store = useStore();
        const quote = ref({});
        onMounted(() => {
            setTimeout(() => {
                quote.value = store.getters.GetSpecificQuote(route.params.id)
            }, 100);
        });
        return {
            quote
        }
    }
}
</script>
Our app is now done and fully functional. Yayy!!!
Conclusion
We have come to the end of this MEVN stack tutorial, I hope you learned a few things from the tutorial. In this article we learned about creating a server with node and express, connecting to MongoDB, and performing CRUD operations. The code for this tutorial can be found here.
