Laravel Livewire – An Introduction
Ever thought of the possibility of writing reactive components in your application that has the capability of managing state, re-rendering as required and doing all the other interesting stuff, without writing any line of Javascript??
Say hello to Laravel Livewire.
Livewire, as described on https://laravel-livewire.com/, is a full-stack framework for Laravel that makes building dynamic front-ends as simple as writing vanilla PHP.
In this tutorial, we are going to get introduced to livewire, build a simple Laravel livewire component so we see how it all works and discuss when to use it and when not to.
Setting Up
As described above, livewire is a framework for laravel. Hence we need Laravel to use livewire.
If you already have laravel installed on your computer, run the following snippet to create a simple laravel project.
laravel new learn-livewire
If you don’t have laravel installed, you can install laravel by running:
composer global require laravel/installer
When that is done, create a new laravel project by running the same snippet as shown above:
laravel new learn-livewire
After creating the project, move into the learn-livewire folder by running:
cd learn-livewire
We can now install livewire in this project
composer require livewire/livewire
Creating a Livewire Component
Livewire is a component-driven framework. It takes ideas from javascript frameworks and brings them to PHP.
A Livewire component can be created by running:
php artisan make:livewire
To create a counter component, we will run:
php artisan make:livewire counter
Livewire will create 2 files: Counter.php and counter.blade.php.
Counter.php is the component class. Here you define the properties in the state, the view to render, and other actions to take place based on user interaction.
If you are familiar with laravel, then counter.blade.php should be familiar. Yes, livewire uses the blade templating engine which we are used to. counter.blade.php is the view file for the Counter component. counter.blade.php can be found at resources/views/livewire/.
The Component Class
The content of Counter.php should be similar to this:
<?php
namespace App\Http\Livewire;
use Livewire\Component;
class Counter extends Component
{
    public function render()
    {
        return view('livewire.counter');
    }
}
The render method is a compulsory method and must be in your livewire component. It tells livewire the view that is associated with this component. Here, we are returning the livewire.counter view.
Again, if you are used to laravel, this should be familiar as it is the same way views are rendered in laravel.
If we move the location of our view file, we will need to update the render function to reflect its new location.
The Component View
Livewire uses laravel blade, which is native to laravel for its templating.
The view file for your component must have exactly one root HTML element. This rule is similar to that of vue templates.
The view file has access to all public properties that were defined in the class.
In raw laravel, we will need to explicitly send these properties to the view but with livewire, that is done out of the box for public properties. Hence, any property that isn’t used in the view should have either protected or private accessibility.
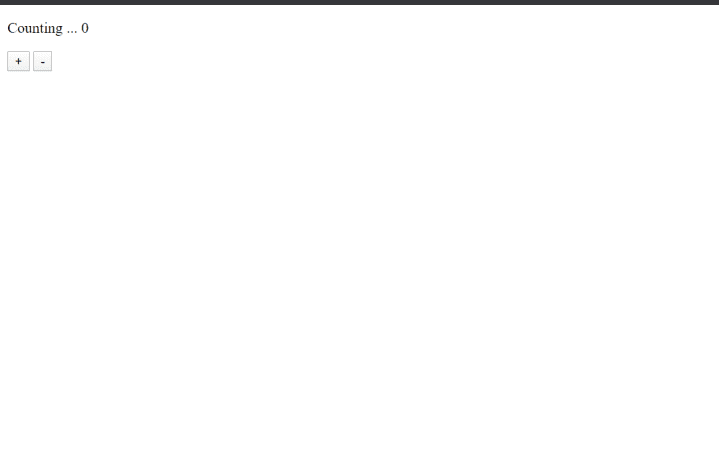
Let’s modify the view file to show some simple content.
Edit counter.blade.php to:
<div>
    <p>Counting ... 0</p>
    <button>+</button>
    <button>-</button>
</div>
After creating the component, we make it display in a page by adding it to the page as such:
@livewire('componentName')
All laravel projects come with a default page — welcome.blade.php, which can be found at resources/views/. Open it up in your text editor and include the livewire component.
You might want to remove all the default laravel sample text that’s contained in the file.
Add the following to the body section of welcome.blade.php
@livewire('counter')Run the laravel server via:
php artisan serveThe counter component should be showing on the browser

Congratulations!!!
You have successfully written your first Livewire component.
Making the Component Interactive
Livewire provides a technique to listen to browser events. Events can be listened by adding `wire:<eventName>` to the element we want to listen on.
<button wire:click="performAction">Click Me</button>
For example, if we want to listen on a button for the click event, we would do that as:
For this to work as expected, @livewireScripts needs to be added to the page which the component will be used.
The action to be performed is a function that was defined in the component class.
Let’s add some interactivity to our counter component.
Modify Counter.php to
<?php
namespace App\Http\Livewire;
use Livewire\Component;
class Counter extends Component
{
    public $count = 0;
    public function increment() {
        $this->count += 1;
    }
    public function render()
    {
        return view('livewire.counter');
    }
}
We need to update the view to use the $count variable created and also to call increment().
<div>
    <p>Counting ... {{$count}}</p>
    <button wire:click='increment'>+</button>
    <button>-</button>
</div>
Go back to the browser and watch it happen.
Endeavour to add @livewireScripts to welcome.blade.php since we are adding some interactivity.

Since that works, we can add the decrement functionality. Just as the increment functionality was added, create a decrement function (public) that handles the decrementing action, then wire dispatch the event with its corresponding action (decrement).
After doing this, counter.php should look like:
<?php
namespace App\Http\Livewire;
use Livewire\Component;
class Counter extends Component
{
    public $count = 0;
    public function increment() {
        $this->count += 1;
    }
    public function decrement() {
        $this->count -= 1;
    }
    public function render()
    {
        return view('livewire.counter');
    }
}
And counter.blade.php,
<div>
    <p>Counting ... {{$count}}</p>
    <button wire:click='increment'>+</button>
    <button wire:click='decrement'>-</button>
</div>
How It Works
If you open your dev tools and move to the network tab, you will notice that livewire sends a request when a click action is performed.
On every event that performs an action, livewire sends an ajax request to the backend with some data. This helps it update the state, and does any other function that is needed to be done in the action. It also returns a JSON response containing the new DOM state and some other information needed for rendering the new state to the DOM.
When to Use Livewire
Occasionally, when building interactive applications, a click from the user will trigger: a state change on the frontend, send an ajax request to the backend and retain state on the frontend if the request was successful or revert to the previous state if the request fails.
Using livewire, there is only one source of truth — the backend. Hence, there will not be a case where the frontend isn’t in sync with the backend.
Conclusion
We’ve learnt about laravel livewire, how it works and when to use it.
So go wire up some components!!!
