Building A Speech Recognition App Using Javascript
In this article, we will build a speech recognition application in javascript without any external api or libraries.
We will make use of the built-in speechRecognition api which lives in the browser.
Prerequisites
- Basic understanding of HTML and CSS
- Good understanding of JavaScript
We will use live-server to sever our application.To do that we need to first of all install live server using npm. To do that open the terminal and type the following:
npm i live-server -gThe -g flag will install live-server globally on our local machine.
Now lets setup the folder structure for our application.
Basically our application will have just 3 files, index.html for our application markup,style.css for the application styles and app.js for all the javascript functions.
To create the files open up the terminal and type the following:
cd desktop
mkdir speech-app && cd speech-app
touch index.js && touch app.js && touch style.css
code .
The cd command is used to move into a directory, The mkdir command is used to create a new directory and the touch command is used to create a new file. The code . is used to open up our application visual studio code.
Now lets setup our index.html file we need to create a custom html boiler plate and then link our style.css and our app.js file.
So now our index.html should look like this:
<!DOCTYPE html>
<html lang="en">
<head>
<meta charset="UTF-8">
<meta name="viewport" content="width=device-width, initial-scale=1.0">
<title>Speech Application</title>
<link rel="stylesheet" href="style.css">
</head>
<body>
<div class="words"></div>
<script src="app.js"></script>
</body>
</html>
Now lets head over to our app.js and start writing some code.
To implement the speech recognition we will make use of the SpeechRecognition api which is a global variable that lives In the browser. If you are using a Chrome browser it is called webkitSpeechRecognition .
So we can create a single variable for this by doing this:
window.SpeechRecognition = window.SpeechRecognition || window.webkitSpeechRecognitionThe next thing we have to do is to create a new instance of speech recognition:
const recognition = new SpeechRecognition();After doing this, we will take the recognition variable and set a property called interimResults and set this to true.
What this does is to give us a result as we are specking, if we set this to false it will return a result after the user must have finished speaking.
recognition.interimResults = true;Now we want a situation whereby when we start speaking it creates a paragraph and then when we stop it ends that paragraph and if we start talking again it creates a new paragraph. So to do that we need to create a new paragraph using the document.createElement method:
let p = document.createElement("p");
p.classList.add("para");
let words = document.querySelector(".words");
words.appendChild(p)
What we just did was to create a new paragraph element and then append it to the div with the class of words.
After doing this we will add an event listener to recognition variable which returns an event:
recognition.addEventListener("result", e => {
console.log(e)
});
recognition.start();
This will prompt the user that the browser needs access to the systems microphone.
Open up the console and refresh the page,It should now prompt you to allow access to the systems microphone.
Grant the permission by clicking the allow button and the start talking,while talking you will see some result on the console:

The console.log(e) result returns a SpeechRecognitionEvent with a property results which is a two-dimensional array. The the first object of this response contains the transcript property.
This property holds the recognized speech in text format. If you haven’t set the property of interimResults to true then you will get only one result with only one alternative back.
To get the actual words of the speaker , we can store the result of the transcript in a variable:
recognition.addEventListener("result", e => {
  const speechToText = e.results[0][0].transcript;
  console.log(speechToText)
})
Setting interimResults to true means that you can start to render results before the user has stopped talking. Saying “hey I’m Wisdom a JavaScript developer” I got the following interim results back:

The last result has a property isFinal and has a value of true.This indicates that the text recognition has finished.
Now that we have the transcript of what we said and the isFinal property when the recognition has finish we can now display the transcript on the browser.
We can loop over the interimTranscript so that it gives us a result while we speak and then while we watch for the isFinal property to be set to true. When it is set to true we now display the final result.With that we can modify the code to this:
let speechToText = "";
recognition.addEventListener("result", e => {
  let interimTranscript = '';
  for (let i = e.resultIndex, len = e.results.length; i < len; i++) {
    let transcript = e.results[i][0].transcript;
    console.log(transcript)
    if (e.results[i].isFinal) {
      speechToText += transcript;
    } else {
      interimTranscript += transcript;
    }
  }
  document.querySelector(".para").innerHTML = speechToText + interimTranscript
});
recognition.addEventListener('end', recognition.start);
recognistion.start();
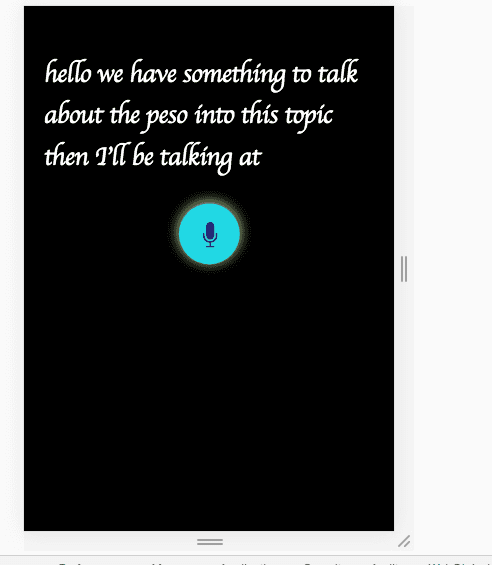
So now when we start specking the interimTranscript result is displayed then when we are done and the isFinal property is set to true we then display the speechToText value.
Modifying languages and accents
If we have users that don’t speak English, we could modify the language preference by specifying a language parameter with recognition.lang . The default language is en-US.
For more info on the language option click here.
Modifying the user interface.
now that we have the core feature of our application, let’s now modify the user interface.Our Focus will be on mobile devices.
We will add a microphone svg in our markup below the div with the class of word:
<div class="obj">
        <div class="button" id="circlein">
            <svg class="mic-icon" version="1.1" xmlns="http://www.w3.org/2000/svg"
                xmlns:xlink="http://www.w3.org/1999/xlink" x="0px" y="0px" viewBox="0 0 1000 1000"
                enable-background="new 0 0 1000 1000" xml:space="preserve" style="fill:#1E2D70">
                <g>
                    <path
                        d="M500,683.8c84.6,0,153.1-68.6,153.1-153.1V163.1C653.1,78.6,584.6,10,500,10c-84.6,0-153.1,68.6-153.1,153.1v367.5C346.9,615.2,415.4,683.8,500,683.8z M714.4,438.8v91.9C714.4,649,618.4,745,500,745c-118.4,0-214.4-96-214.4-214.4v-91.9h-61.3v91.9c0,141.9,107.2,258.7,245,273.9v124.2H346.9V990h306.3v-61.3H530.6V804.5c137.8-15.2,245-132.1,245-273.9v-91.9H714.4z" />
                </g>
            </svg>
        </div>
    </div>
And the add some simple styles in the style.css file :
body {
    background-color: black;
    padding: 15px;
    font-family: cursive;
    color: white;
    font-size: 30px
}
#circlein {
    width: 70px;
    height: 70px;
    border-radius: 50%;
    justify-content: center;
    box-shadow: 0px -2px 15px #E0FF94;
}
.obj {
    display: flex;
    justify-content: center;
    height: 100%;
}
.mic-icon {
    height: 30px;
    position: absolute;
    margin: 21px;
}
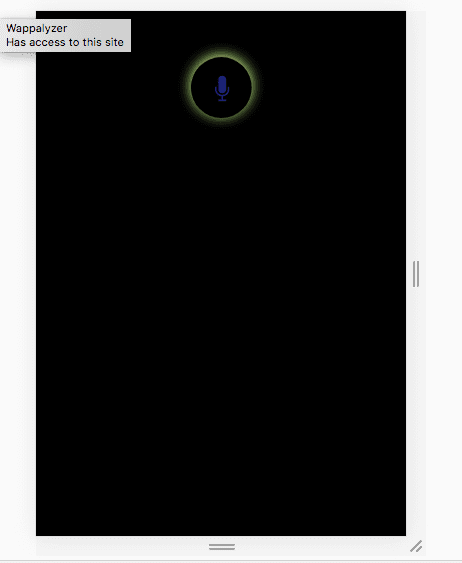
With this simple markup and styles we will have a result like this:

Now we want a situation where by when we click on the mic element it starts recording and when we stop talking the mic element is disabled:
let mic = document.querySelector("#circlein")
let speechToText = "";
recognition.addEventListener("result", e => {
  let interimTranscript = '';
  for (let i = e.resultIndex, len = e.results.length; i < len; i++) {
    let transcript = e.results[i][0].transcript;
    console.log(transcript)
    if (e.results[i].isFinal) {
      speechToText += transcript;
    } else {
      interimTranscript += transcript;
    }
  }


  recognition.addEventListener('soundend', () => {
    mic.style.backgroundColor = null;
  });


  document.querySelector(".para").innerHTML = speechToText + interimTranscript
})


mic.addEventListener("click", () => {
  recognition.start();
  mic.style.backgroundColor = "#6BD6E1"
})
With this we just built a speech recognition application without any dependency or package.
Conclusion
In this article, we learned how to use the javascript speechregonition API to build a simple application. Not that you have to be connected to the internet for this to work and also note that the application has to be served on a server too. Click here to get the source code.
