Build a Food content detection App with Vue composition API
In this tutorial, I will show you how to build a food content detection Application using vue composition API and Clarifai food model API.
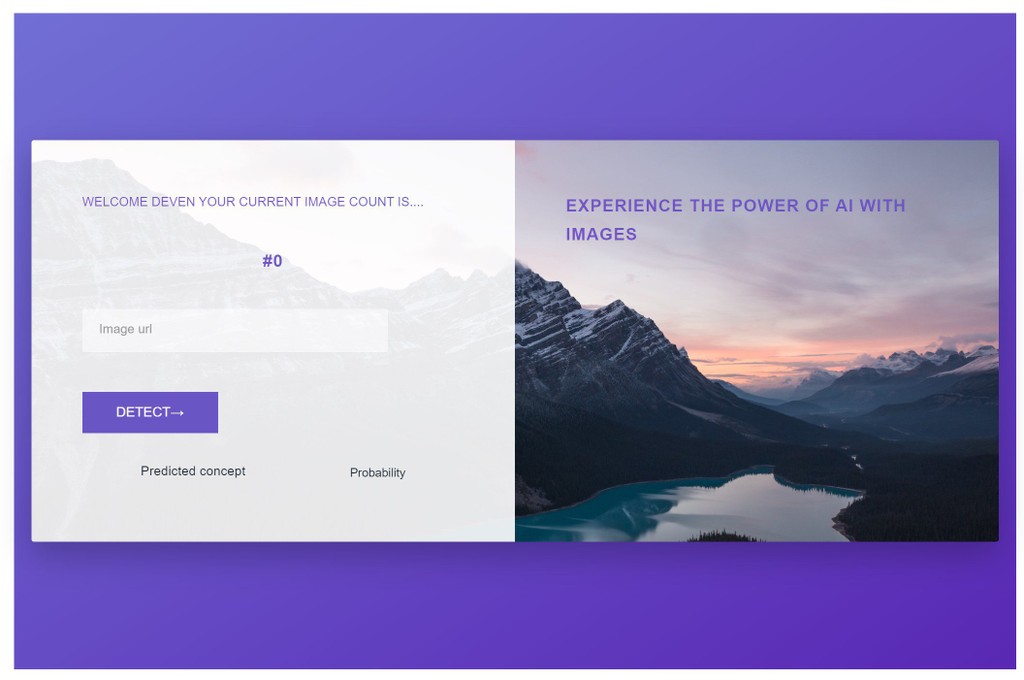
Overview of the Food Content Detection Application
The food content detection application will receive an image link then send the link to the Clarifai food model endpoint which detects the content of the food. When food content is detected, the users rank increments.
Technology
- Vue 2.6.10
- Clarifai
Prerequisite
- Basic knowledge of HTML, CSS, and JavaScript.
- Basic understanding of ES6 features such as
- Let
- const
- Destructuring
- Arrow functions
- Classes
- Import and Export
- Basic understanding of how to use npm.
- Signup for Clarifai API to get a free API key for 5,000 free operations each month.
Building applications with the Composition API
Though vue 3 stable release is not launched yet, we can still use its composition API in vue 2.To see how the vue 3 composition API can further be used in vue 2, let’s create food content detection application out of the composition functions. For data, we’ll use Clarifai food model API. You need to sign up and get an API key to follow along with this. Our first step is to create a project folder using Vue CLI:
# install Vue's CLI
npm install -g @vue/cli

# create a project folder
vue create food-content-detection-app

#navigate to the newly created project folder
cd food-content-detection-app

#run the app in a developement environment
npm run serve
To use the composition API, we have to install it differently with the following command:
npm install @vue/composition-api
After installation, we have to import it in our main.js file:
import Vue from 'vue'
import App from './App.vue'
import VueCompositionApi from '@vue/composition-api';

Vue.use(VueCompositionApi);
Vue.config.productionTip = false
new Vue({
  render: h => h(App),
}).$mount('#app')
It’s important to note that for now, the composition API is just a different alternative for writing components and does not displace the vue option API. We can still write our components using component options, scoped slots and mixins as usual.
Also, To use the Clarifai API, we have to install it differently with the following command:
npm install clarifai
then import it to the component it will be usedimport Clarifai from 'clarifai'
Building the individual components
For this app, we’ll have four components:
App.vue: This is the parent component — it handles and collects data from the children components-FoodContent,FoodImage,RankandImageLinkForm.FoodContent: A child component — It receive the food content data as props from theAppcomponent.FoodImage: A child component — It receive the food’s image url data as props from theAppcomponent.Rank: A child component — It receive the rank data as props from theAppcomponent through theImageLinkFormcomponent.ImageLinkForm: A child component – It receives the following propsrank,onImageLinkChange,onImageLinkSubmitfrom theAppcomponent and further passes down the rank props to theRankcomponent. The@changeevent handler triggers the onImageLinkChange props which execute theonImageLinkChangemethod in theAppcomponent While the@submit.preventevent handler in the form tag triggers theonImageLinkSubmitprops which execute theonImageLinkSubmitmethod in theAppcomponent.
In your project’s src folder, add the code snippet below to the App.vue component:
<template>
  <div id="app">
    <section class="section-book">
            <div class="row">
                <div class="book">
                    <div class="book__form">
                        <ImageLinkForm
                          :rank="rank"
                          :onImageLinkSubmit="onImageLinkSubmit"
                          :onImageLinkChange="onImageLinkChange"
                          :foodContents="foodContents"
                        />
                        <ul class="model-container-tag-list">
                          <li class="model-container-tag-list-column">
                              <p><span class="predicted-concept-name">Predicted concept</span></p>
                              <p><span class="tag-prob">Probability</span></p>
                          </li>
                      </ul>
                        <foodContent
                          v-for="foodContent in foodContents"
                          :foodContent="foodContent"
                          :key="foodContent.name"
                        />
                    </div>
                    <div class="detect-image">
                        <div>
                            <div class="u-margin-bottom-medium">
                                <h2 class="heading-secondary">
                                    Experience the power of AI with Images
                                </h2>
                            </div>
                            <FoodImage :imageUrl="imageUrl"/>
                        </div>
                    </div>
                </div>
            </div>
        </section>
  </div>
</template>
<script>
import Clarifai from 'clarifai'
import { reactive, toRefs } from '@vue/composition-api';
import ImageLinkForm from './components/ImageLinkForm'
import FoodImage from './components/FoodImage'
import foodContent from './components/FoodContent'
export default {
  name: 'App',
  components: {
    ImageLinkForm,
    FoodImage,
    foodContent
  },
  setup() {
    // creating an instance of Clarifai
    const app = new Clarifai.App({
    apiKey: 'YOUR CLARIFAI API KEY'
    });
    const state = reactive({
      imageUrl: "",
      inputField: "",
      foodContents: [],
      rank: 0,
    });
    const onImageLinkChange = (event) => {
      state.inputField = event.target.value;
    }
    const displayFoodContent = (data) => {
      const foodItems = data.outputs[0].data.concepts;
      return foodItems.map( foodItem => {
        const name = foodItem.name;
        const val = foodItem.value;
        return {
          name,
          val
        }
      })
    }

    const listFood = (data) =>{
      state.foodContents = data;
    }
    const incrementRank = () => {
      state.rank++
    }
    //Submit our image url to the Clarifai face detection model api
    const onImageLinkSubmit = (event) => {
      state.imageUrl = state.inputField;

      //Make request to the clarifai face detection model api endpoint
      app.models
      .predict(
        Clarifai.FOOD_MODEL,
        state.inputField)
      .then(response => {
        listFood(displayFoodContent(response));
        incrementRank();
      })
      .catch(err => console.log(err));

    }
    return {
      ...toRefs(state),
      onImageLinkSubmit,
      onImageLinkChange
    }
  }

};
</script>
<style>
li {
    list-style: none;
}
.model-container-tag-list {
    display: flex;
    flex-wrap: wrap;
    width: 100%;
    justify-content: space-between;
    align-items: center;
}
.model-container-tag-list-column {
    margin-top: 25px;
    display: flex;
    justify-content: space-around;
    width: 100%;
    padding: 1rem;
}
.predicted-concept-name {
    z-index: 1;
    font-family: 'Roboto Mono', sans-serif;
    font-size: 15px;
    font-weight: 500;
    line-height: 20px;
    padding: 12px 0;
    letter-spacing: 0.2px;
    color: #1b2634;
}
.tag-prob {
    z-index: 1;
    padding: 0 0 0 5px;
    font-family: 'Roboto Mono', sans-serif;
    font-size: 14px;
    font-weight: 400;
    color: #1c2838;
}
</style>
setup – The setup function is a new component option. It serves as the entry point for using the Composition API inside components. It controls the logic of the component and returns the methods and variables for use in the template. It receives props and context as arguments.
reactive: It returns a reactive object. The template gets re-rendered each time any property or method in the reactive object changes.toRefs
: It converts a reactive object to a plain object, where each property on the resulting object is a ref pointing to the corresponding property in the original object.
In your project’s src/components folder, create a FoodContent.vue file and add the code snippet below :
<template>
    <div>
        <ul class="model-container-tag-list">
            <li class="model-container-tag-list-column">
                <p><span class="predicted-concept-name">{{foodContent.name}}</span></p>
                <p><span class="tag-prob">{{foodContent.val}}</span></p>
            </li>
        </ul>
    </div>
</template>
<script>
export default {
    props: {
        foodContent: {
            type: Object
        }
    }

}
</script>
<style scoped>
li {
    list-style: none;
}
.food-content {
    background-color: #7355c5;
    color: #fff;
    display: flex;
    justify-content: space-around;
    align-items: center;
}
.model-container-tag-list {
    display: flex;
    flex-wrap: wrap;
    width: 100%;
    justify-content: space-between;
    align-items: center;
}
.model-container-tag-list-column {
    margin-top: 25px;
    display: flex;
    justify-content: space-around;
    width: 100%;
    padding: 1rem;
}
.predicted-concept-name {
    z-index: 1;
    font-family: 'Roboto Mono', sans-serif;
    font-size: 15px;
    font-weight: 500;
    line-height: 20px;
    padding: 12px 0;
    letter-spacing: 0.2px;
    color: #1b2634;
}
.tag-prob {
    z-index: 1;
    padding: 0 0 0 5px;
    font-family: 'Roboto Mono', sans-serif;
    font-size: 14px;
    font-weight: 400;
    color: #1c2838;
}
</style>
In your project’s src/components folder, create a FoodImage.vue file and add the code snippet below :
<template>
    <div class="img-detect">
        <img :src="imageUrl" alt="" width="100%">
    </div>
</template>
<script>
export default {
  name: 'FoodImage',
  props: {
      imageUrl: {
          type: String
      }
  },

};
</script>
<style>
</style>
In your project’s src/components folder, create a Rank.vue file and add the code snippet below :
<template>
    <h2 class=" heading-secondary">
        #{{rankCount}}
    </h2>
</template>
<script>
import {  ref } from '@vue/composition-api';
export default {
  name: 'Rank',
  props: {
    rankCount: {
      type: Number,
      required: true,
    }
  },

};
</script>
<style>
</style>
In your project’s src/components folder, create a ImageLinkForm.vue file and add the code snippet below :
<template>
<div>
<form @submit.prevent="onImageLinkSubmit" class="form">
<div class="u-margin-bottom-medium">
<h2 class="heading-primary">
Welcome Deven Your current image count is....
</h2>
</div>
<div class="t-center u-margin-bottom-medium">
<Rank :rankCount="rank"/>
</div>
<div class="form__group">
<input type="text" @change="onImageLinkChange" class="form__input" placeholder="Image url" id="name" required>
<label for="name" class="form__label">Image url</label>
</div>
<div class="form__group">
<button class="btn btn--green" type="submit">Detect→</button>
</div>
</form>
</div>
</template>
<script>
import Rank from './Rank'
export default {
name: 'ImageLinkForm',
components: {
Rank,
},
props: {
rank: {
type: Number,
required: true,
},
onImageLinkSubmit: {
type: Function,
},
onImageLinkChange: {
type: Function,
},
},
};
</script>
<style>
</style>
Run the Application
You can run our App with the command:
npm run serve
If the process is successful, the Browser opens with Url: http://localhost:3000/ with our app running.
Conclusion
Finally, we have built our food content detection app with vue 3 composition API. It’s interesting to see how the vue 3 Composition API is used in vue 2. One of its key advantages I’ve observed is the reduction in usage of the this keyword and also, its reactivity. Feel free to add new features to the app, as this is a great way to learn.
You can check out the source code here

