Build A Desktop Application with Vuejs and Electronjs
In this Vuejs electron tutorial, we will build a note-taking desktop application. Electron is a framework for creating native applications with web technologies like JavaScript, HTML, and CSS. It takes care of the hard parts so you can focus on the core of your application.
Prerequisites
- Familiarity with HTML, CSS, and JavaScript (ES6+).
- Vs code or any code editor installed on your development machine.
- Basic knowledge of Vuejs.
Before we kick off
Learn Vue.js and modern, cutting-edge front-end technologies from core-team members and industry experts with our premium tutorials and video courses on VueSchool.io.
Setting up Vuejs electron application
Let’s start by creating a folder for our Vuejs electron application. We will then initialise a new Vue application inside this folder. To do that open up your terminal and type the following:
cd desktop
mkdir electronvueapp && cd electronvueapp
vue create electronvuenote
Running the vue create electronvuenote will create a new Vue application. Before that, you will be asked some questions to set up the application.
Step 1

Choose “Manually select features” and click enter so that we can be explicit about which libraries we want to include in our new project.
Step 2

To select and control an item on the list, you can use your arrows to move up and down and then press the spacebar when you want to select/deselect a feature: select Router, Babel, and Vuex. Vuex will be used for state management.
Step 4

Type Y to use history mode in Vue.
Step 5

Select package.json file for your config store
Step 6
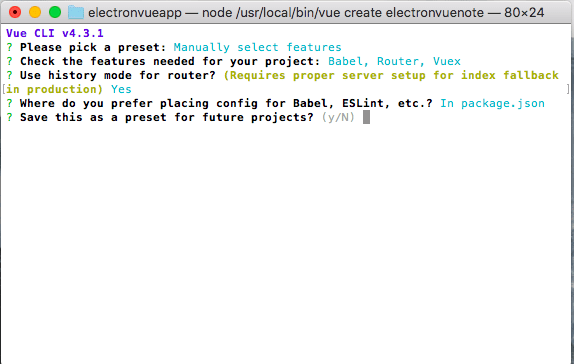
If you want to save this as a preset you can by typing Y, if not type N and press enter.
When the Vue CLI finishes creating our application, we’ll open up the electronvueapp folder in our text editor. If you are using Vs code you could do this by typing code . on your terminal.
To run the Vue app run the following codes on the terminal:
cd electronvuenote
npm run serve
After compiling, it will be outputted on the terminal that the application is running on port http://localhost:8080/.
Note that the port number might differ on some local machines.
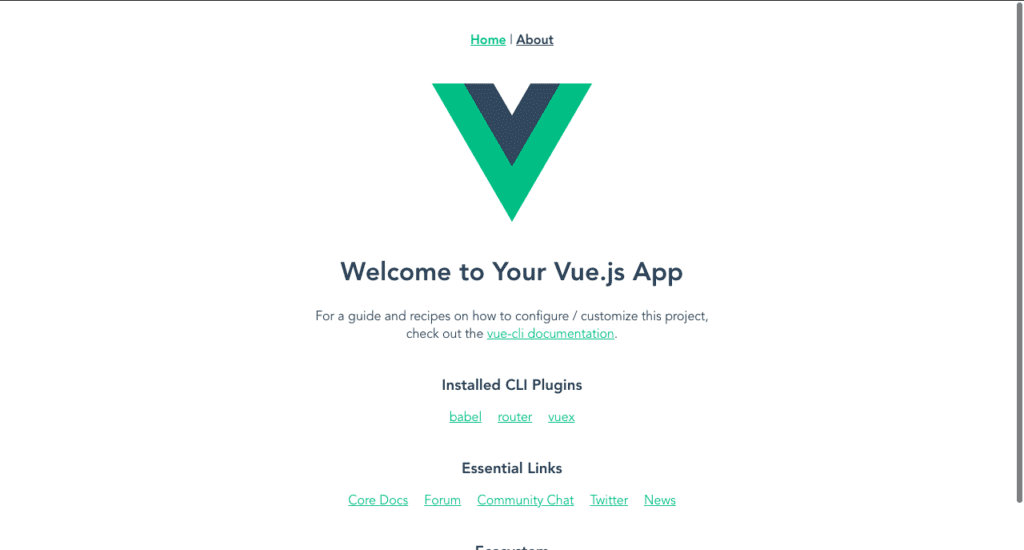
Accessing http://localhost:8080/ on our browser we will have this displayed:
Now that we have our Vuejs application up and running we need to add the electron-builder package to our Vue application.
This helps to package and build a ready for distribution Electron app for macOS, Windows, and Linux with “auto-update” support out of the box.
To add this package to our application run this on the terminal:
vue add electron-builderAfter running this command you will be prompted to choose your preferred version,choose the latest version and click enter to continue.
When the installation is completed it add a background.js file to the src directory and then it adds some scripts to our package.js file:
"electron:build": "vue-cli-service electron:build",
    "electron:serve": "vue-cli-service electron:serve",
    "postinstall": "electron-builder install-app-deps",
    "postuninstall": "electron-builder install-app-deps"
Now to run the application as a desktop app run:
npm run electron:serveAfter running this, it will open up a desktop application that looks like a Vue application:
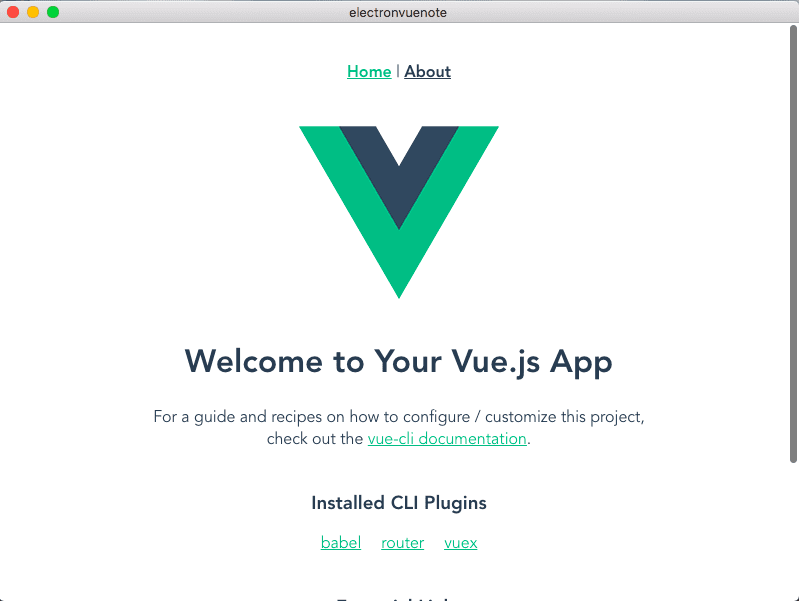
And then you will see this in your console which means that the app is running.

Now that we have the electron app running we can start implementing our Notes features.
Lets start by cleaning up the UI.Head over to src/App.vue and modify the code with this:
<template>
  <div id="app">
    <router-view />
  </div>
</template>
<style>
@import url("https://fonts.googleapis.com/css2?family=Baloo+Tamma+2:wght@500&display=swap");
* {
  font-family: "Baloo Tamma 2", cursive;
}
body {
  text-align: center;
  padding: 0px;
  margin: 0px;
}
</style>
After doing this we need to create some components for the application.Head over to the src/components folder and create 3 components :addnote.vue,listnote.vue and add content.vue
<template>
  <div>
    <h1>Notes</h1>
  </div>
</template>
and this to the content.vue:
<template>
  <section>
    <h1>Content</h1>
  </section>
</template>
After doing this lets modify the codes in the src/views/Home.vue to this:
<template>
  <div class="grid-container" v-bind:style="{height:height+'px'} ">
    <div class="Notes">
      <listnote />
    </div>
    <div class="Content">
      <notecontent />
    </div>
  </div>
</template>
<script>
import listnote from "@/components/listnote.vue";
import notecontent from "@/components/content.vue";
export default {
  name: "Home",
  components: {
    notecontent,
    listnote
  },
  data() {
    return {
      height: window.innerHeight
    };
  }
};
</script>
<style>
.grid-container {
  display: grid;
  grid-template-columns: 0.7fr 1fr;
  grid-template-rows: 1fr;
  gap: 0px 0px;
  grid-template-areas: "Notes Content";
}
.Notes {
  grid-area: Notes;
  border-right: 2px dotted black;
}
.Content {
  grid-area: Content;
}
</style>
This will result this the layout:
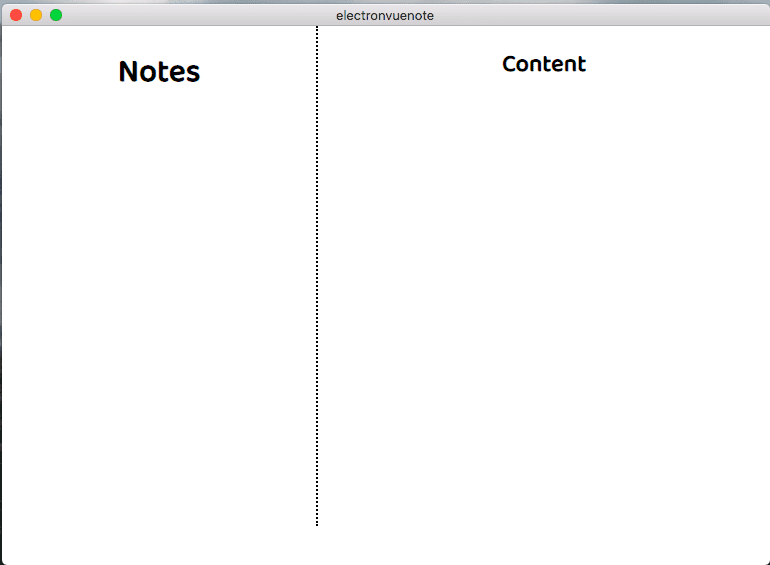
This is where we will be listing our notes and its contents.
Now that we have the layout for our application we can now setup Vuex for state management. We will start by creating dummy notes in our state and then loop over it in the listnote.vue component.Head over to src/store/index.js and add some states:
state: {
    notes: [{
        id: 1,
        title: 'This is the first note',
        note: 'This is the first description about bla bla black sheep..This is the content of this particular note...it has an id of 1 for now'
      },
      {
        id: 2,
        title: 'This is the second note',
        note: 'This is the second description about bla bla black sheep..This is the content of this particular note...it has an id of 2 for now'
      },
      {
        id: 3,
        title: 'This is the third note',
        note: 'This is the third description about bla bla black sheep..This is the content of this particular note...it has an id of 3 for now'
      }
    ]
  },
After doing this we need to declare a getter that will list all the notes:
getters: {
    notes: state => {
      return state.notes
    },
  },
Now we need to bring in our notes into the listnote.vue. To do that modify the code there with this:
<template>
  <section>
    <div id="item" v-for="(note,id) in notes" :key="id">
      <h3>{{note.title}}</h3>
      <p>{{note.note.slice(0,35)}}...</p>
    </div>
  </section>
</template>
<script>
import { mapGetters } from "vuex";
export default {
  computed: {
    ...mapGetters(["notes"])
  }
};
</script>
<style scoped>
#item * {
  text-align: left !important;
}
#item {
  padding: 5px 9px;
}
section #item:hover {
  background: black;
  transition: ease 0.4s;
  color: white;
}
section #item:first-of-type {
  background: black;
  transition: ease 0.4s;
  color: white;
}
h3 {
  text-transform: uppercase;
  margin: 3px 0 !important;
  cursor: pointer;
}
p {
  text-transform: capitalize;
  color: #ced0d1;
  margin: 3px 0;
}
</style>
We start by bringing in the Vuex getter that returns all our note ,we loop over the notes and then we add some styles to the section.We then use the slice method to get only the first 35 characters and append … at the end to limit the number of characters we display to fit into our UI.Feel free to use a filter here by doing:
filters: {
    truncate(text, length, suffix) {
      return text.substring(0, length) + suffix;
    }
  }
then you can output the data this way:
<p>{{note.note | truncate(30, '...')}}</p>Now that we have listed our notes, let’s display the content when we click on the individual notes. First we need to create a state to hold the individual item:
noteData: {},After doing this we will create a mutation that will update our state:
 GET_NOTE(state, payload) {
      state.noteData = payload
    }
It’s a good convention to name your mutations in uppercase. Now we need to create a getter that will get a note by its id by passing the noteId as a param:
singleNote: state => noteId => {
      return state.notes.find(note => note.id == noteId)
    }
With this done we will create an action that will call the singleNote function in our getter.This action will update our state by calling the GET_NOTE mutation:
showNote: (context, param) => {
      let data = context.getters.singleNote(param);
      context.commit('GET_NOTE', data);
},
This action will return the note that has the id that has been passed in the params.Now we can dispatch this function when we click on our individual notes by passing in the id as a payload.We now need to add a click event to the looped note items:
<div id="item" v-for="(note) in notes" :key="note.id">
      <h3 @click="selectNote(note.id)">{{note.title}}</h3>
      <p>{{note.note.slice(0,35)}}...</p>
    </div>
And then we define the selectNote function which will dispatch the showNote function that we defined in our Vuex action:
methods: {
    selectNote(id) {
      this.$store.dispatch("showNote", id);
    }
  },
We pass the selected note id as a payload in the dispatched function.
Now lets head over to our content.vue component and display the selected note information.Modify the code there with this:
<template>
  <section>
    <h1>{{noteData}}</h1>
  </section>
</template>
<script>
import { mapState } from "vuex";
export default {
  computed: {
    ...mapState(["noteData"])
  },
  mounted() {
    this.$store.dispatch("showNote", 1);
  }
};
</script>
Here we bring in our mapState from Vuex and then call our noteData state that we defined in our Vuex state. When we load our app by default, noteData returns an empty object because no item has been clicked. To fix that we will dispatch the showNote action in our mounted lifecycle hook and the pass one by default. This will get the first note in our notes array in our Vuex store.

Now that we can display our notes ,lets implement add of notes.lets create the user interface for adding of note.Modify the code in the addNote.vue component to this:
<template>
<section>
<button id="btn" type="button" @click="showModal">New Note</button>
<transition name="slide-fade">
<div id="myModal" class="modal" v-show="isShow">
<div class="modal-content">
<div class="modal-header">
<span class="close" @click="isShow = false">×</span>
<h2>Add Note</h2>
</div>
<div class="modal-body">
<form>
<div>
<label for="full-name">Title</label>
<br />
<input type="text" id="title" placeholder="Note Title" required />
</div>
<div>
<label for="Content">Content</label>
<br />
<textarea cols="70" rows="10"></textarea>
<br />
<button>Add</button>
</div>
</form>
</div>
</div>
</div>
</transition>
</section>
</template>
<script>
export default {
data() {
return {
isShow: false
};
},
methods: {
showModal() {
this.isShow = !this.isShow;
}
}
};
</script>
<style scoped>
#btn {
position: absolute;
bottom: 40px;
}
input,
textarea {
padding: 0.6rem;
box-sizing: border-box;
justify-content: space-between;
font-size: 0.9rem;
}
label {
text-align: right;
width: 30%;
}
input,
textarea {
border: 2px solid #000000;
width: 50%;
border-radius: 2px;
}
button {
padding: 5px 20px;
background: #000000;
color: #ffffff;
}
.slide-fade-enter-active {
transition: all 0.3s ease;
}
.slide-fade-leave-active {
transition: all 0.3s cubic-bezier(1, 0.5, 0.8, 1);
}
.slide-fade-enter,
.slide-fade-leave-to {
transform: translateX(10px);
opacity: 0;
}
.modal {
position: fixed;
z-index: 1;
left: 0;
top: 0;
width: 100%;
height: 100%;
overflow: auto;
background-color: rgba(0, 0, 0, 0.4);
}
.modal-content {
position: fixed;
bottom: 0;
background-color: #fefefe;
width: 100%;
}
.close {
color: white;
float: right;
font-size: 28px;
font-weight: bold;
}
.close:hover,
.close:focus {
color: #504d4d;
text-decoration: none;
cursor: pointer;
}
.modal-header {
padding: 1px 10px;
background-color: #000000;
color: white;
}
.modal-body {
padding: 5px 10px;
}
</style>This is just a simple form with some styles to make the user interface look nice.Now we will register this component as a child component in our listnote.vue component:
import addnote from "@/components/addnote";Then register the component:
components: {
    addnote
  },
We can now all our component <addnote /> in our template.
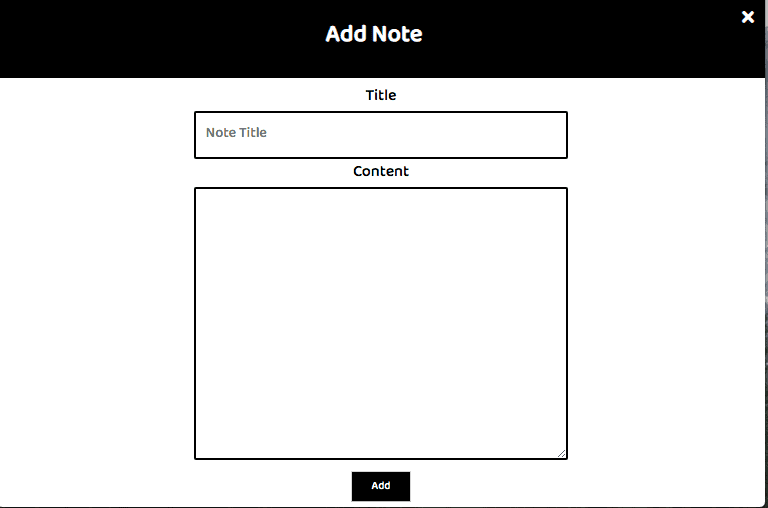
We can now focus on implementing the ‘add note’ feature in our application. We will start by creating a mutation that will push the inputted note to the notes array.
 ADD_NOTE(state, payload) {
      state.notes.push(payload)
}
After that we will create an action that will commit to the mutation:
addNote: (state, payload) => {
      state.commit('ADD_NOTE', payload)
    },
After doing this we need to create a getter that will update the id of our notes.
updateId(state) {
      let lastid = 3
      state.notes.forEach(element => {
        if (element.id > lastid) {
          lastid = element.id ;
        }
      });
      return lastid;
    }
Since we have 3 default notes in our application, we create a variable called lastid and give it a value of 3 which is the last id in our notes array.
After doing this we can now head over to our addnotes component and bind the input fields to the data property that we will define so that we can get the inputted values.Lets update our form to this:
 <form @submit.prevent="AddNewNote">
              <div>
                <label for="full-name">Title</label>
                <br />
                <input v-model="note.title" type="text" id="title" placeholder="Note Title" required />
              </div>
              <div>
                <label for="Content">Content</label>
                <br />
                <textarea v-model="note.content" cols="70" rows="10"></textarea>
                <br />
                <button type="submit">Add</button>
              </div>
  </form>
Then we will create the data property that we bind in our input fields:
note: { title: "", content: "" }We need to bring in our Vuex actions and getter so that we can access it in our component.to do that we will import them:
import { mapActions, mapGetters } from "vuex";And then add it as a computed property:
computed: {
    ...mapGetters(["updateId"]),
    ...mapActions(["addNote"])
  }
We need to define our AddNewNote function:
AddNewNote() {
      this.$store.dispatch("addNote", {
        id: this.updateId + 1,
        title: this.note.title,
        note: this.note.content
      });
      this.note = {};
      this.isShow = false;
    }
This will dispatch our addnote function that we defined in our Vuex and the we pass the inputed value as the payload.After click the add button we clear the form and hide the input field.Do this and test your application.
Deleting A Note
Now that we can add and view our notes. Let’s implement the delete function. Let’s start by adding X to the notes list by doing this:
<div id="item" v-for="note in notes" :key="note.id">
      <span class="deleteicon" @click="removeNote(note)">X</span>
      <h3 class="title" @click="selectNote(note.id)">{{note.title}}</h3>
      <p>{{note.note.slice(0,35)}}...</p>
    </div>
We add a span tag to the note title and then give it a class of deleteicon. Add the following style to style the deleteicon class:
.deleteicon {
  float: right;
  cursor: pointer;
  font-size: 25px;
}
.deleteicon:hover {
  color: gray;
}
Now we need to create a mutation for deleting a note.Head over to Vuex and add this mutation:
DELETE_NOTE: (state, note) => {
      let noteIndex = state.notes.findIndex(n => n.id === note.id);
      state.notes.splice(noteIndex, 1);
    },
We, first of all, find the index of the note that we want to delete using the javascript findIndex method. When this index is found, we will use the javascript splice method to remove the note with the id from the state.
We now need to create an action that will commit to this mutation to delete that note:
deleteNote: (state, note) => {
      state.commit('DELETE_NOTE', note)
    }
After doing this we need to import Vuex mapAction into the listnote component. Then we add a click event listener to the X icon. This event will call a method that will dispatch the Vuex action.
Lets start by bringing in mapAction:
import {mapActions, mapGetters} from 'vuex'Then we need to bring in the deleteNote function that we define in our Vuex action using the computed property:
 ...mapActions([
      'deleteNote',
    ]),
We add a click event to the X icon:
<span class="deleteicon" @click="removeNote(note)">X</span>Then we define the deleteNote function:
removeNote(data) {
      this.$store.dispatch("deleteNote", data);
      this.selectNote(this.notes[0].id);
    }
Now we need to display our Note data correctly instead of displaying the object. let’s modify our content.vue file to this:
<template>
  <section>
    <h1>{{noteData.title}}</h1>
    <p>{{noteData.note}}</p>
  </section>
</template>
<script>
import { mapState } from "vuex";
export default {
  computed: {
    ...mapState(["noteData"])
  },
  mounted() {
    this.$store.dispatch("showNote", 1);
  }
};
</script>
<style scoped>
section {
  padding: 25px;
}
h1 {
  font-size: 35px;
}
section * {
  text-align: left !important;
}
</style>
After formatting our content, we will have this result:
Conclusion
Vuejs electron applications are just like any other desktop application as they are installed locally on the user’s hard drive. They can be launched directly from the Windows taskbar or the OSX Dock, and there is no need to start a browser and navigate to some URL to run your application. Building vuejs electron Applications is lovely but could get complicated as the application grows bigger. Click here to get the source code.

