Build A Blog App with ExpressJs and SvelteJs
Svelte makes use of a new approach to building user interfaces. Instead of doing the necessary work in the browser, Svelte shifts that work to a compile-time phase that happens on the development machine when you’re building your app.
In this article, We will build a simple blog application with expressjs and Sveltejs.
Prerequisites
- Familiarity with HTML, CSS, and JavaScript (ES6+).
- Node.js and npm installed on your development machine.
- Vs code or any code editor installed on your development machine.
- Basic Knowledge of Expressjs.
Here is the demo of the app we are going to build:
Outline
Below is the outline of the steps we will be taking to accomplish the task. We will start up with building our backend service then after that, we build our frontend.
Setting up the backend
- Setup Nodejs with the
npm init -ycommand - Setup a file structure for our application.
- Install all the required dependencies for our application
- Create an express server and configure all dependencies.
- Create a
Blogmodel. - Create the necessary routes.
- Test the endpoints.
Setup Nodejs with the npm init -y command
Before creating a new nodejs application, let’s start by creating a folder on our home directory for our application. Open up your terminal and type the following:
cd desktop
mkdir blogapp && cd blogapp
mkdir clientapp
mkdir serverapp
cd serverapp
What we just did was was create a new folder on our home directory for our application, then create two folders inside it, one for our client-side application and the other for our server-side application. After that, we move into the serverapp folder to create a new nodejs project for our application.
To set up a nodejs application we will need a package.json file to handle all of our project dependencies. So to create that we need to run npm init -y on our terminal.
npm init -yAfter running this command, a package.json file will be generated.
Setup a file structure for our application.
Let’s create a file structure for our application. Open up your terminal and type the following to set up the file structure for your application.
touch index.js
mkdir config && mkdir api
cd api
mkdir models && mkdir controllers && mkdir routes
cd controllers && touch blogController.js && cd ..
cd models && touch Blog.js && cd ..
cd routes && touch blog.js && cd ..
cd .. && cd config && touch db.js
cd .. && code .
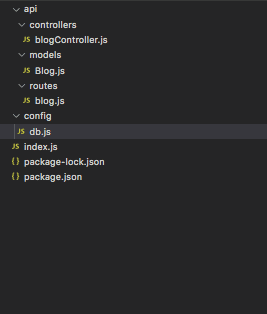
Our file structure should now look like this:
Install all the required dependencies for our application
Our application will need some npm packages for development. I will explain all the packages below:
Expressjs: A node.js framework that makes it easy to build web applications.mongodb: A document-oriented NoSQL database used for high volume data storage.mongoose: An object modeling tool used to asynchronous query MongoDB.nodemon: Nodemon will re-run the express server every time we make changes to our code.morgan: Morgan is a logger tool used to log all requests made on the server.body-parser: body-parser is what allows express to read the request body and then parse that into a JSON object that we can be understood.cors: This is a middleware that can be used to enable CORS with various options.
Expressjs: A node.js framework that makes it easy to build web applications.mongodb: A document-oriented NoSQL database used for high volume data storage.mongoose: An object modeling tool used to asynchronous query MongoDB.nodemon: Nodemon will re-run the express server every time we make changes to our code.morgan: Morgan is a logger tool used to log all requests made on the server.body-parser: body-parser is what allows express to read the request body and then parse that into a JSON object that we can be understood.cors: This is a middleware that can be used to enable CORS with various options.
The first thing we need to do is to install nodemon globally so that it can be accessed anywhere on our local machine. To install that open ur terminal and type this command:
npm i nodemon -gAfter installing nodemon globally, we need to install other dependencies for our application:
npm i express mongoose morgan body-parser cors --saveThis command will install all these packages and add them among our dependencies in the package.js file. It also creates a node-modules folder which is where all the packages are been stored. Remember not to add this package while you are pushing your project to git. To avoid this we need to create a .gitignore file. To do this, open your terminal and run this command:
touch .gitignoreThis command will create a .gitignore file. Open the file and type node-modules in it.
Create an express server and configure all dependencies.
Now head over to the index.js file and type the following code:
const express = require("express");
const PORT = process.env.PORT || 4000;
const morgan = require("morgan");
const cors = require("cors");
const bodyParser = require("body-parser");
const mongoose = require("mongoose");
const config = require("./config/db");
const app = express();
//configure database and mongoose
mongoose.set("useCreateIndex", true);
mongoose
  .connect(config.database, { useNewUrlParser: true })
  .then(() => {
    console.log("Database is connected");
  })
  .catch(err => {
    console.log({ database_error: err });
  });
// db configuaration ends here
//registering cors
app.use(cors());
//configure body parser
app.use(bodyParser.urlencoded({ extended: false }));
app.use(bodyParser.json());
//configure body-parser ends here
app.use(morgan("dev")); // configire morgan
// define first route
app.get("/", (req, res) => {
  res.json("Hola Svelte Developers...Shall we fight??");
});
app.listen(PORT, () => {
  console.log(`App is running on ${PORT}`);
});
And then add this code to the config/db.js :
module.exports = {
  database: "mongodb://localhost:27017/svelteblog",
  secret: "password"
};
In the above code snippet, we initialize express into our project, we then require all our packages and then we configure the packages and our database.
Create Blog model
Let’s create the blog schema by going to api/model/Blog.js and type the following code:
let mongoose = require("mongoose");
let blogSchema = mongoose.Schema({
  title: {
    type: String,
    required: true
  },
  content: {
    type: String,
    required: true
  },
  category: {
    type: String,
    required: true
  },
  author: {
    type: String,
    required: true
  },
  created: {
    type: Date,
    default: Date.now()
  }
});
var Blog = mongoose.model("Blog", blogSchema);
module.exports = Blog;
We start by creating our mongoose schema which takes in an object defining the property of the blog schema. Mongoose converts the schema into a document in the database and those properties will be converted into fields in our document.
Create the necessary routes.
Now let’s create our routes. Below is the list of endpoints we will be creating:
HTTP POST /blog—— Create a new blog post.HTTP GET /blog——- Get all blog post.HTTP DELETE /blog/:blogId—— Delete a blog post.HTTP PUT /blog/:blogId——- Update a blog post.
Let’s start by creating the blog route. Head over to api/routes/blog.js and write the following code:
const express = require("express");
const router = express.Router();
const blogController = require("../controllers/blogController");

router.get("/", blogController.allBlogPost);
router.post("/", blogController.addBlogPost);
router.delete("/:blogId", blogController.deleteBlogPost);
router.put("/:blogId", blogController.updateBlogPost);

module.exports = router;
And head over to api/controllers/blogControllers to define the controllers.
let mongoose = require("mongoose");
const Blog = require("../models/Blog");

exports.allBlogPost = async (req, res) => {
  try {
    let posts = await Blog.find();
    res.status(200).json(posts);
  } catch (err) {
    res.status(500).json(err);
  }
};

exports.addBlogPost = async (req, res) => {
  try {
    const post = new Blog({
      title: req.body.title,
      content: req.body.content,
      category: req.body.category,
      author: req.body.author
    });
    let newPost = await post.save();
    res.status(200).json({ data: newPost });
  } catch (err) {
    res.status(500).json({ error: err });
  }
};

exports.deleteBlogPost = async (req, res) => {
  try {
    const id = req.params.blogId;
    let result = await Blog.remove({ _id: id });
    res.status(200).json(result);
  } catch (err) {
    res.status(500).json(err);
  }
};

exports.updateBlogPost = async (req, res) => {
  try {
    const id = req.params.blogId;
    let result = await Blog.findByIdAndUpdate(id, req.body);
    res.status(200).json(result);
  } catch (err) {
    res.status(500).json(err);
  }
};
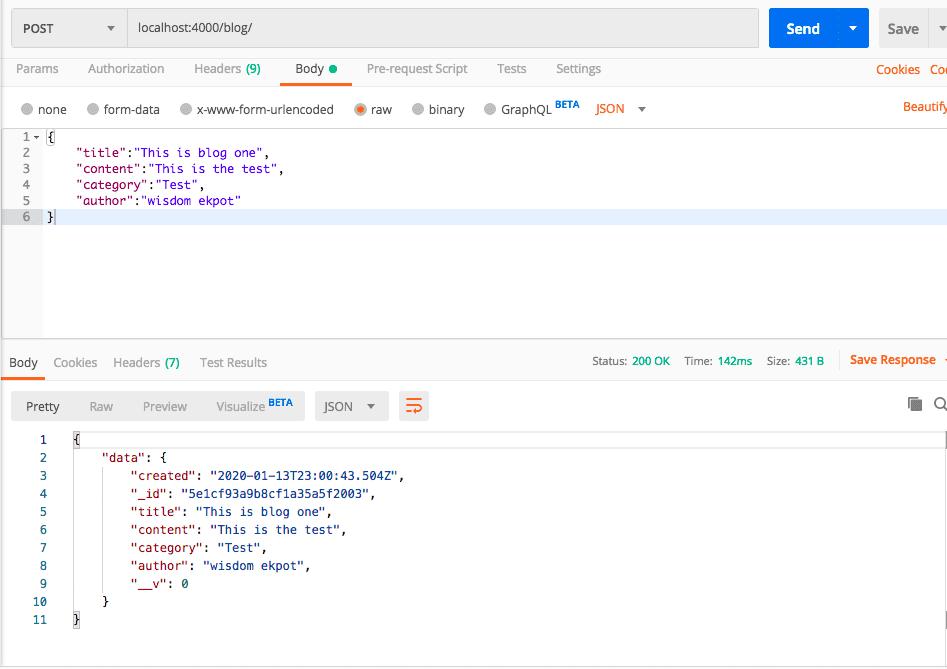
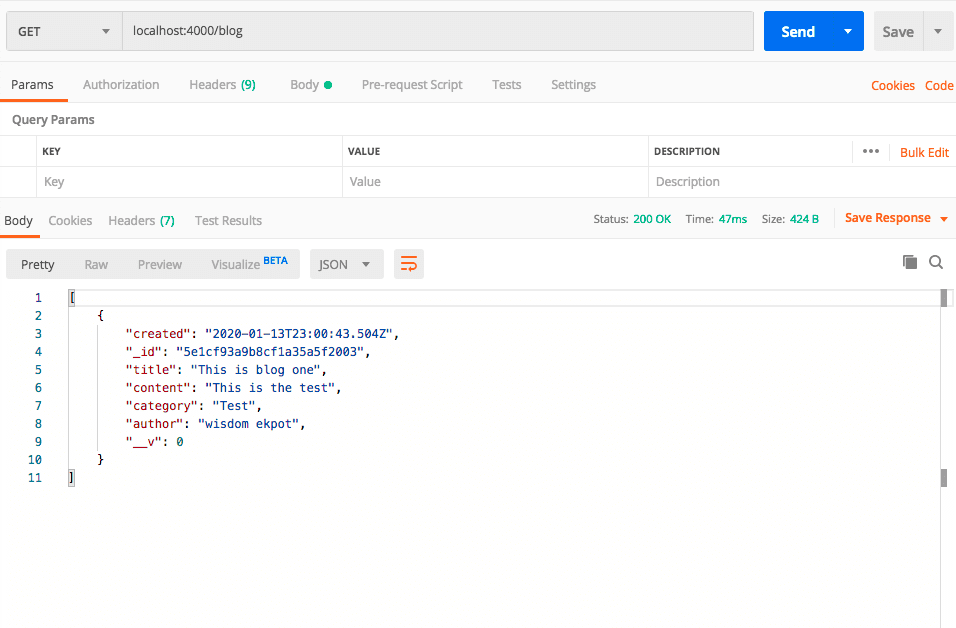
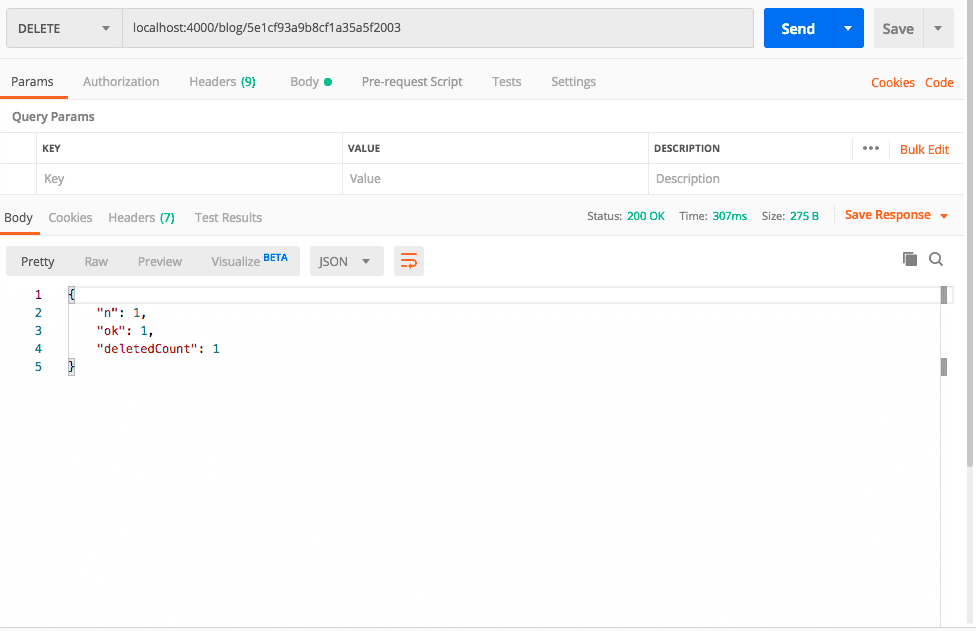
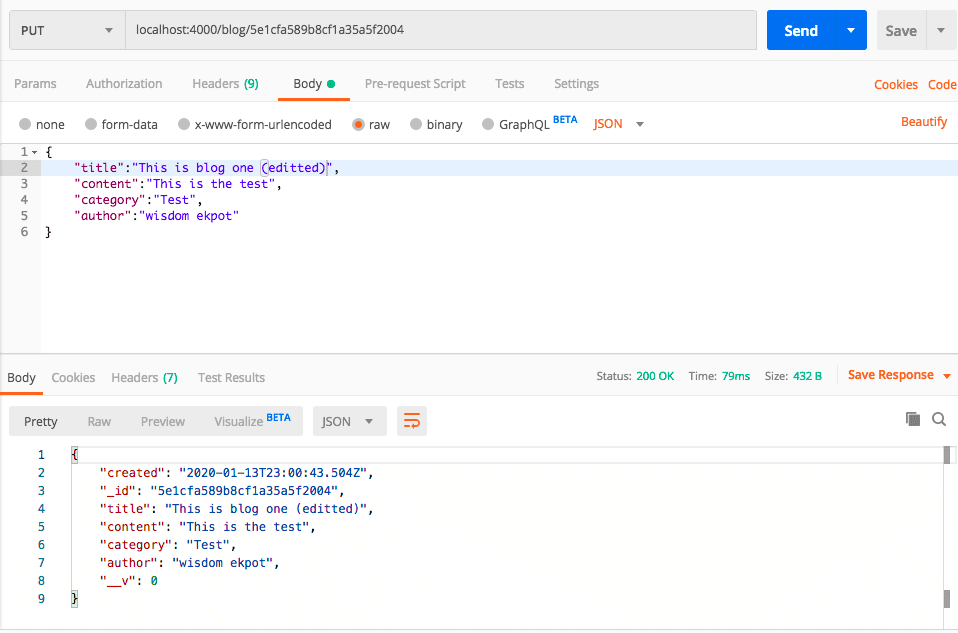
Now that the necessary endpoints have been created, let’s test them using POSTMAN.
Create new blog post:
Delete blog post
Update blog post
Building The Frontend.
They are many ways to get Svelte up and running for a project. For the purpose of this article, we will be working withdegit which is a software scaffolding tool. To start, run the following commands:
cd desktop/blogapp/clientapp
npx degit sveltejs/template blog-app
After doing this cd(move) into the project folder and run npm install.After installing the dependencies run npm run dev to run the application. This will start the app on localhost, on port 5000, by default:
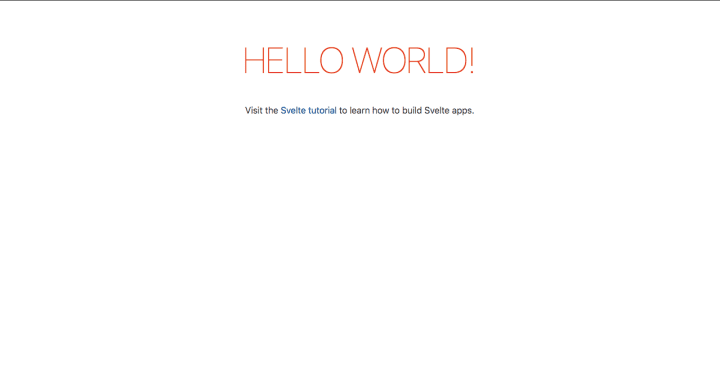
After setting up, in the src/main.js , we should see a “hello world” that renders into the src/app.svelte .
import App from './App.svelte';
const app = new App({
    target: document.body,
    props: {
        name: 'world'
    }
});
export default app;
In the src/app.svelte we can see some sort of VueJS format:
<script>
    export let name;
</script>
<main>
    <h1>Hello {name}!</h1>
    <p>Visit the <a href="https://svelte.dev/tutorial">Svelte tutorial</a> to learn how to build Svelte apps.</p>
</main>
<style>
    main {
        text-align: center;
        padding: 1em;
        max-width: 240px;
        margin: 0 auto;
    }
    h1 {
        color: #ff3e00;
        text-transform: uppercase;
        font-size: 4em;
        font-weight: 100;
    }
    @media (min-width: 640px) {
        main {
            max-width: none;
        }
    }
</style>
This is where the main.js file gets handled by exporting the name variables to allow it to be manipulated from outside.
We will be using Bootstrap for our project development, let’s add the bootstrap cdn in our index.html file. Go to public/index.html and add the bootstrap cdn in the head section like this:
<!DOCTYPE html>
<html lang="en">
  <head>
    <meta charset="utf-8" />
    <meta name="viewport" content="width=device-width,initial-scale=1" />
    <title>Svelte app</title>
    <link rel="icon" type="image/png" href="/favicon.png" />
    <link rel="stylesheet" href="/global.css" />
    <link rel="stylesheet" href="/build/bundle.css" />
    <!-- boostarp cdn starts here  -->
    <link
      rel="stylesheet"
      href="https://stackpath.bootstrapcdn.com/bootstrap/4.4.1/css/bootstrap.min.css"
      integrity="sha384-Vkoo8x4CGsO3+Hhxv8T/Q5PaXtkKtu6ug5TOeNV6gBiFeWPGFN9MuhOf23Q9Ifjh"
      crossorigin="anonymous"
    />
    <!-- bootstrap cdn ends here  -->
    /build/bundle.js
    <style>
      body {
        background: #f2f4f8;
      }
    </style>
  </head>
  <body>
    https://code.jquery.com/jquery-3.4.1.slim.min.js
    https://cdn.jsdelivr.net/npm/popper.js@1.16.0/dist/umd/popper.min.js
    https://stackpath.bootstrapcdn.com/bootstrap/4.4.1/js/bootstrap.min.js
  </body>
</html>
Setup File Structure for application
In the src directory, let’s create a components folder and inside the components folder lets create a navbar.svelte file and type the following code:
<nav class="navbar navbar-expand-lg navbar-light bg-dark">
  <a class="navbar-brand text-light" href="#">Blog</a>
</nav>
and then modify the code in the App.svelte file with this:
<script>
  import Navbar from "./components/navbar.svelte";
</script>
<Navbar />
We should get like this in our browser after the modification:

Now let’s create a component that will list all blog posts. In the src directory, create a Home. svelte file and add the following codes:
<script>
  import { onMount } from "svelte";
  const baseUrl = "http://localhost:4000/blog";
  let posts = [];
  onMount(async () => {
    let res = await fetch(baseUrl);
    posts = await res.json();
    console.log(posts);
  });
</script>
<section class="mt-5">
  <div class="container">
    <div class="row">
      {#if posts.length === 0}
        <p>Loading</p>
      {:else}
        {#each posts as post}
          <div class="col-md-4">
            <div class="card">
              <div class="card-header">{post.category}</div>
              <div class="card-body">
                <h5 class="card-title">{post.title}</h5>
                <p class="card-text">{post.content}</p>
                <button class="btn btn-info">Edit</button>
                <button class="btn btn-danger">Delete</button>
              </div>
            </div>
          </div>
        {/each}
      {/if}
    </div>
  </div>
</section>
After doing this, Don’t forget to register the component in the App.svelte in the script section:
import Home from "./components/Home.svelte";and the init the component by adding <Home /> right after the <Navbar /> .
Let’s create a component for adding of a blog post. In the src directory, let’s create a PostForm.svelte file and add this code:
<script>
  import { createEventDispatcher } from "svelte";
  const dispatch = createEventDispatcher();
  let data = {
    title: "",
    category: "",
    author: "",
    content: ""
  };
  const baseUrl = "http://localhost:4000/blog";
  let addNewPost = async () => {
    if (
      data.title.trim() === "" ||
      data.category.trim() === "" ||
      data.author.trim() === "" ||
      data.content.trim() === ""
    ) {
      return;
    }
    const res = await fetch(`${baseUrl}`, {
      method: "POST",
      headers: {
        "Content-Type": "application/json"
      },
      body: JSON.stringify(data)
    });
    const post = res.json();
    dispatch("postCreated", post);
  };
</script>
<section class="mt-4">
  <div class="container">
    <div class="row">
      <div class="col-md-5">
        <div class="card p-3">
          <form on:submit|preventDefault={addNewPost}>
            <div class="form-group">
              <label for="title">Title</label>
              <input
                bind:value={data.title}
                type="text"
                class="form-control"
                id="text"
                placeholder="Title" />
            </div>
            <div class="form-group">
              <label for="title">Category</label>
              <input
                bind:value={data.category}
                type="text"
                class="form-control"
                id="text"
                placeholder="Category" />
            </div>
            <div class="form-group">
              <label for="title">Author</label>
              <input
                bind:value={data.author}
                type="text"
                class="form-control"
                id="text"
                placeholder="Author" />
            </div>
            <div class="form-group">
              <label for="content">Content</label>
              <textarea
                bind:value={data.content}
                class="form-control"
                id="content"
                rows="3"
                placeholder="Content" />
            </div>
            <button type="submit" class="btn btn-primary">Add Note</button>
          </form>
        </div>
      </div>
    </div>
  </div>
</section>
And Update the code in Home.svelte to this :
<script>
  import { onMount } from "svelte";
  import PostForm from "./PostForm.svelte";
  const baseUrl = "http://localhost:4000/blog";
  let posts = [];
  onMount(async () => {
    let res = await fetch(baseUrl);
    posts = await res.json();
    console.log(posts);
  });
  let addpost = ({ detail: post }) => {
    posts = [post, ...posts];
  };
</script>
<PostForm on:postCreated={addpost} />
<section class="mt-5">
  <div class="container">
    <div class="row">
      {#if posts.length === 0}
        <p>Loading</p>
      {:else}
        {#each posts as post}
          <div class="col-md-4 mb-3">
            <div class="card">
              <div class="card-header">{post.category}</div>
              <div class="card-body">
                <h5 class="card-title">{post.title}</h5>
                <p class="card-text">{post.content}</p>
                <button class="btn btn-info">Edit</button>
                <button class="btn btn-danger">Delete</button>
              </div>
            </div>
          </div>
        {/each}
      {/if}
    </div>
  </div>
</section>
And in the Home.svelte import the PostForm.svelte and register it like this <PostForm on:postCreated={addpost} /> and then add a function that will update the posts array:
let addpost = ({ detail: post }) => {
    posts = [post, ...posts];
  };
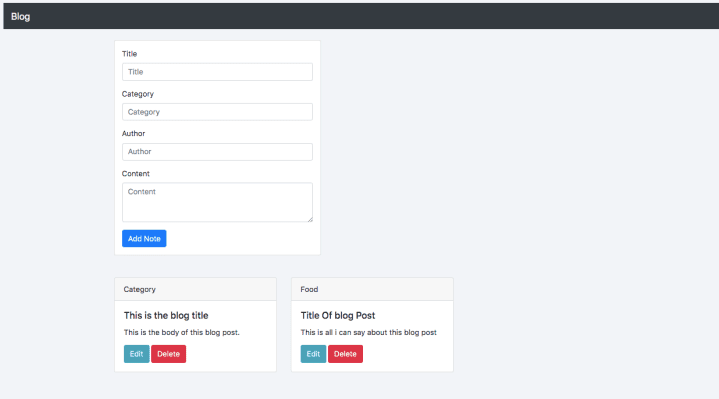
We should get something like this in our browser after the modification:
Delete A Blog Post
To delete a blog post we need to add a click event to the delete button and the pass the post id as a parameter: <button class="btn btn-danger" on:click={deletePost(post._id)}>Delete</button> and the define the method inside the script tag:
let deletePost = async id => {
    if (confirm("Are You Sure?")) {
      let res = await fetch(`${baseUrl}/${id}`, {
        method: "DELETE"
      });
      posts = posts.filter(p => p._id !== id);
    } else {
      alert("Your Post is safe!!");
    }
  };
Updating Post
Let’s add a click event listener to our edit button that will listen to a function to edit the blog post. The event listener will pass the post details in its params:<button class="btn btn-info"on:click={editPostDetails(post)}>Edit</button> and then we need to define an object in the script tag that will hold the selected post details:
let editPost = {
    title: "",
    category: "",
    author: "",
    content: "",
    id: null
  };
And then we define the editPostDetails function:
let editPostDetails = async post => {
    editPost = post;
    console.log(post);
  };
Now we need to pass the editPost object as a prop to the PostForm component by doing this:<PostForm on:postCreated={addpost} {editPost} />.
Now, let’s move over to the PostForm component and make some modifications.
To accept a prop in svelte you need to export it. We can do that by adding export let editPost in the script section.
But on clicking the edit button, it doesn’t populate the input field as expected, so to fix that we need to add some reactivity in it by adding $: data = editPost in the script section.
Now clicking the edit button will populate the input fields with the selected post. But there is still an issue, we have to change the value of the button when its on edit mode.
So to do this let’s edit the submit button with :
<button type="submit" class="btn btn-primary">
{editPost._id ? 'Update' : 'Submit'}</button>
We have to edit addNewPost so that it can listen to when editPost._id is null or not. Before that let’s create two variable in the script section to hold the URL and method of request:
let URL, method;And then edit the addNewPost function to this:
let addNewPost = async () => {
    if (
      data.title.trim() === "" ||
      data.category.trim() === "" ||
      data.author.trim() === "" ||
      data.content.trim() === ""
    ) {
      return;
    }
    loading = true;
    if (editPost._id) {
      URL = `${baseUrl}/${editPost._id}`;
      method = "PUT";
      console.log("pre", editPost);
    } else {
      URL = `${baseUrl}`;
      method = "POST";
      console.log("not", editPost);
    }
    const res = await fetch(URL, {
      method,
      headers: {
        "Content-Type": "application/json"
      },
      body: JSON.stringify(data)
    });
    const post = res.json();
    dispatch("postCreated", post);
    data = {
      title: "",
      category: "",
      author: "",
      content: ""
    };
    loading = false;
  };
We need to also modify our form to this:
<form on:submit|preventDefault={addNewPost}>
              <div class="form-group">
                <label for="title">Title</label>
                <input
                  bind:value={editPost.title}
                  type="text"
                  class="form-control"
                  id="text"
                  placeholder="Title" />
              </div>
              <div class="form-group">
                <label for="title">Category</label>
                <input
                  bind:value={editPost.category}
                  type="text"
                  class="form-control"
                  id="text"
                  placeholder="Category" />
              </div>
              <div class="form-group">
                <label for="title">Author</label>
                <input
                  bind:value={editPost.author}
                  type="text"
                  class="form-control"
                  id="text"
                  placeholder="Author" />
              </div>
              <div class="form-group">
                <label for="content">Content</label>
                <textarea
                  bind:value={editPost.content}
                  class="form-control"
                  id="content"
                  rows="3"
                  placeholder="Content" />
              </div>
              <button type="submit" class="btn btn-primary">
                {editPost._id ? 'Update' : 'Submit'}
              </button>
            </form>
Let’s add a little modification to addpost function in the home.svelte to avoid adding the same post:
let addpost = ({ detail: post }) => {
    if (posts.find(p => p._id === post._id)) {
      const index = posts.findIndex(p => p._id === post._id);
      let postUpdated = posts;
      console.log(postUpdated);
      postUpdated.splice(index, 1, post);
      posts = postUpdated;
    } else {
      posts = [post, ...posts];
    }
  };
Thats it..We just created an application using Expressjs and Sveltejs.
Compared to other javascript frameworks and platforms like Angular, React and Vue.js, Svelte introduces a new concept into JavaScript-based web development. By using a compiler approach Svelte makes sure that only highly optimized plain JavaScript, CSS and HTML code is delivered to the client. For source code click here .
